Last updated June 24, 2020
openredis is an add-on that provides access to a Redis database. Redis is an open source, advanced key-value store. It is often referred to as a data structure server since keys can contain strings, hashes, lists, sets and sorted sets. More information can be found at redis.io.
openredis is accessible via an API and has supported client libraries for C, C#, C++, Clojure, Dart, Erlang, Fancy, Go, Haskell, Io, Java, Lua, Node.js, Objective C, Perl, PHP, Python, Ruby, Scala, Smalltalk and Tcl.
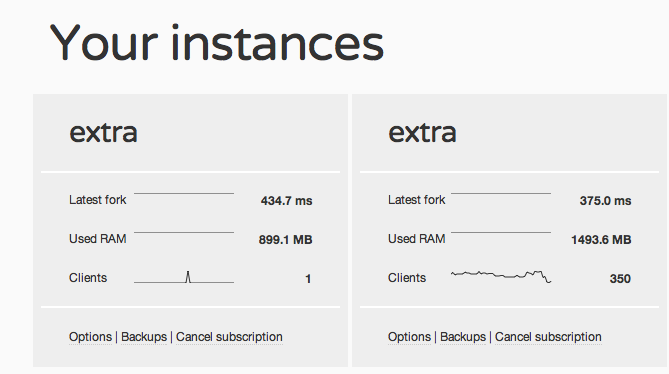
This is how your dashboard will look like once the add-on is integrated:

Provisioning the add-on
openredis can be attached to a Heroku application via the CLI:
A list of all plans available can be found here.
$ heroku addons:create openredis
-----> Adding openredis to sharp-mountain-4005... done, v18 (micro)
Once openredis has been added an OPENREDIS_URL setting will be
available in the app configuration and will contain the canonical
URL used to access the newly provisioned Redis instance. This can be
confirmed using the heroku config command.
$ heroku config | grep OPENREDIS_URL
OPENREDIS_URL: redis://:password@host:port
After installing openredis the application should be configured to fully integrate with the add-on.
You can open your openredis dashboard and view the current memory usage
of your instance by using the heroku addons:open command.
$ heroku addons:open openredis
Local setup
Environment setup
It’s important to note that access to your database is restricted to the AWS cloud.
Using Redis from Ruby
Using Redis from Ruby is very straightforward. Start by installing the Redis client:
$ gem install redis
Now, create a client and connect it to Redis:
$redis = Redis.connect :url => ENV["OPENREDIS_URL"]
Setup for Sinatra
require "redis"

class MyApp < Sinatra::Base
  configure do
    $redis = Redis.connect :url => ENV["OPENREDIS_URL"]
  end
end
Setup for Rails 3.x
Ruby on Rails applications will need to add the following entry into
their Gemfile specifying the openredis client library.
gem "redis"
Update application dependencies with bundler.
$ bundle install
You can connect to Redis by using the OPENREDIS_URL:
$redis = Redis.connect :url => ENV["OPENREDIS_URL"]
Using Redis from Python
Install redis-py:
$ pip install redis
Then connect to Redis:
import os
import redis

REDIS_URL = os.environ['OPENREDIS_URL']

client = redis.from_url(REDIS_URL)
Using Redis from Node.js
Install node_redis:
$ npm install redis
Then use the following snippet to connect to Redis:
var url   = require("url").parse(process.env.OPENREDIS_URL);
var redis = require("redis").createClient(url.port, url.hostname);

redis.auth(url.auth.split(":")[1]);
Using Redis from PHP
Install Predis:
Then use the following snippet to connect to Redis:
$redis = new Predis\Client(getenv('OPENREDIS_URL'));
$redis->set('foo', 'bar');
$value = $redis->get('foo');
Using Redis from Java
Install Jedis by following the author’s instructions.
Then use the following snippet to connect to Redis:
Jedis jedis = new Jedis(System.getenv("OPENREDIS_URL"));
Development environment
When developing locally it is best to turn off the integration with
openredis to minimize dependencies on remote services. You can use a
local Redis server, and point OPENREDIS_URL to localhost and the
appropriate port.
For example:
ENV["OPENREDIS_URL"] = "redis://localhost:6379"

$redis = Redis.connect(:url => ENV["OPENREDIS_URL"])
Troubleshooting
Make sure you can connect with redis-cli. If that works, check
you are getting the credentials right in your application. For
support questions, you can find us at #openredis on Freenode, mention
@openredis on Twitter, or simply
email us at info@openredis.com.
Migrating between plans
Application owners should carefully manage the migration timing to ensure proper application function during the migration process.
Upgrading an instance is easy and incurs no downtime. In order to upgrade your instance, simply execute:
$ heroku addons:upgrade openredis:small
-----> Upgrading openredis:small to sharp-mountain-4005... done, v18 ($35/mo)
       Your plan has been updated to: openredis:small
After that, a new instance, with a new URL will be provisioned.
Your OPENREDIS_URL will also be updated automatically and your
application will be restarted gradually.
If you’re not using the OPENREDIS_URL variable directly, your
application will not get the changes. Please update your app first
to use OPENREDIS_URL before upgrading, or make sure you change
any custom REDIS_URL you are using to the new OPENREDIS_URL
value.
Removing the add-on
openredis can be removed via the CLI.
This will destroy all associated data and cannot be undone!
$ heroku addons:destroy openredis
-----> Removing openredis from sharp-mountain-4005... done, v20 (micro)
Before removing openredis a data export can be performed by setting up a local instance of redis-server as a follower of the openredis instance.
Support
All openredis support and runtime issues should be submitted to one of the Heroku Support channels. Any non-support related issues or product feedback is welcome at info@openredis.com.
Additional resources
Additional resources are available at: