Last updated May 12, 2026
Heroku AppLink uses Salesforce external client apps (ECA) for OAuth authentication. ECAs are the modern replacement for connected apps and are the recommended OAuth client type for new AppLink integrations. This guide walks through creating an external client app configured to use with the Heroku AppLink add-on.
As of the Salesforce Spring ’26 release, you can no longer create new connected apps in Salesforce. We’re deprecating using connected apps with Heroku AppLink, and replacing them with external client apps. From now on, use external client apps instead of connected apps with your Heroku AppLink integrations. To create external client apps with the --auth-external-client-app-name CLI flag, your Salesforce org must be on the Summer ‘26 release and later.
If you have existing connected apps in your Salesforce org, you can still reference them in the API spec file or migrate them to external client apps.
Permissions
To create ECAs, you need these permissions in the Salesforce org:
Customize ApplicationModify All DataorManage External Client Apps
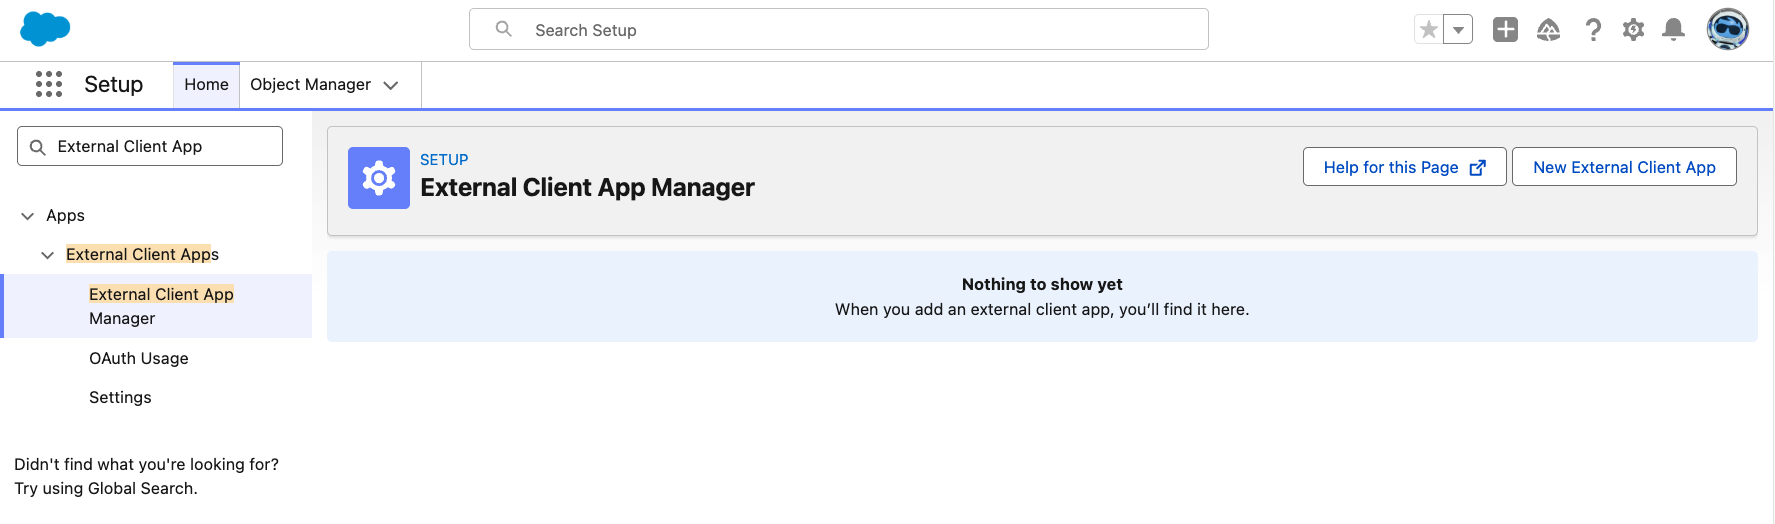
Step 1: Create an External Client App in Setup
- From Salesforce Setup, in the
Quick Findbox, enter and selectExternal Client App Manager. If this page doesn’t show up, enter and selectExternal Client Appin some releases. - Select
New External Client App.
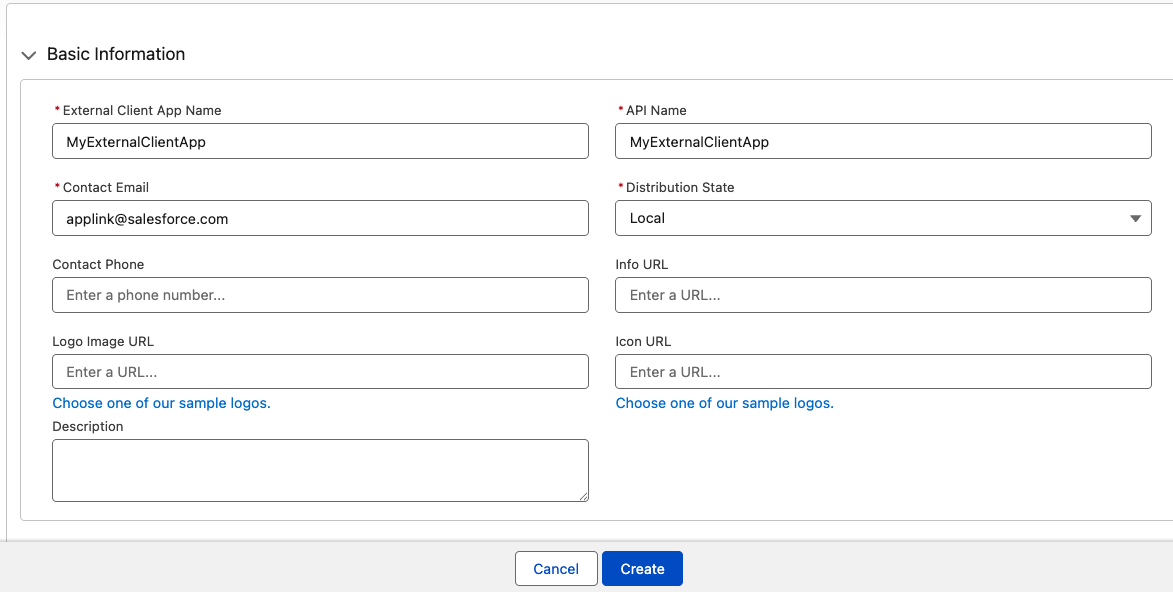
- Complete the
Basic Informationsection:External Client App Name: the display name for your ECA.API Name: this field must match theexternalClientAppreference in your API spec file. Salesforce auto-fills this field from the display name, but you can edit it. Name it carefully, because renaming later is difficult.Contact Email: a valid address for the publisher.Distribution State: selectLocalto only scope the ECA to this org only.
- Click
Create.
Step 2: Enable OAuth and Required OAuth Scopes
- On the ECA’s detail page, select the
Settingstab. - Click
Editand expand theOAuth Settingssection. - Select the
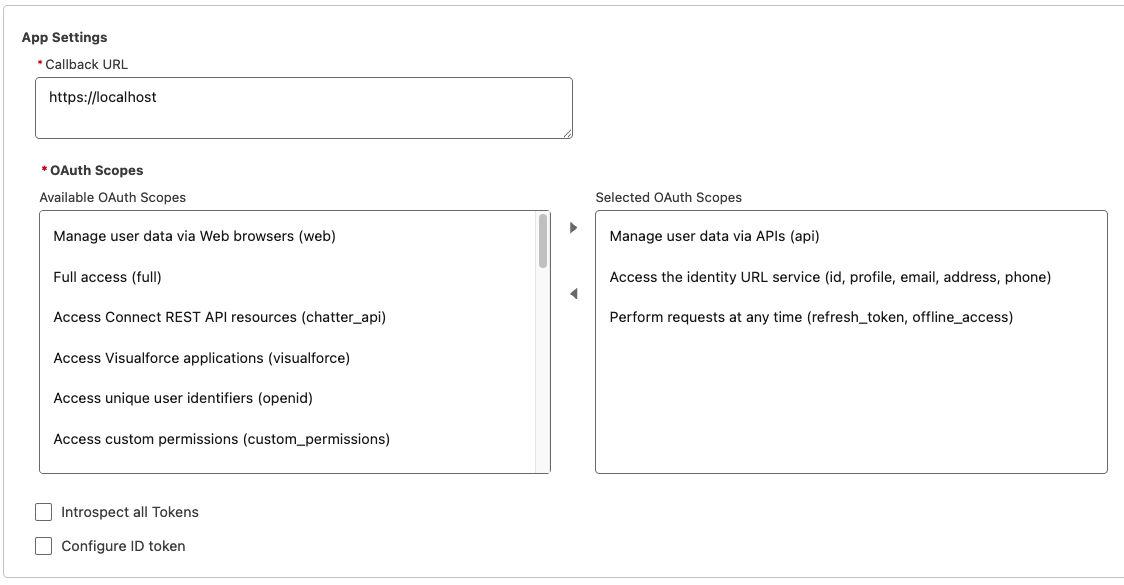
Enable OAuthcheckbox. - Set
Callback URLtohttps://localhost. - Under
OAuth Scopes, add the required scopes:
| Scope Label | Scope Key | Description |
|---|---|---|
Manage user data via APIs |
api |
AppLink can call Salesforce REST APIs on the user’s behalf. |
Access the identity URL service |
id, profile, email, address, phone |
AppLink uses the identity URL during the OAuth callback to resolve the authenticating user. Without it, the callback completion can’t read the username. |
Perform requests at any time |
refresh_token, offline_access |
Gives AppLink a refresh token so the connection survives beyond the initial access token’s lifetime. Without it, the connections break when the first token expires. |
- Click
Save.
In the Security section, leave Require Secret for Web Server Flow and Require Secret for Refresh Token Flow enabled by default unless you have a specific reason to change them.
Step 3: Configure Refresh Token Policy
- On the ECA’s detail page, select the
Policiestab. - Click
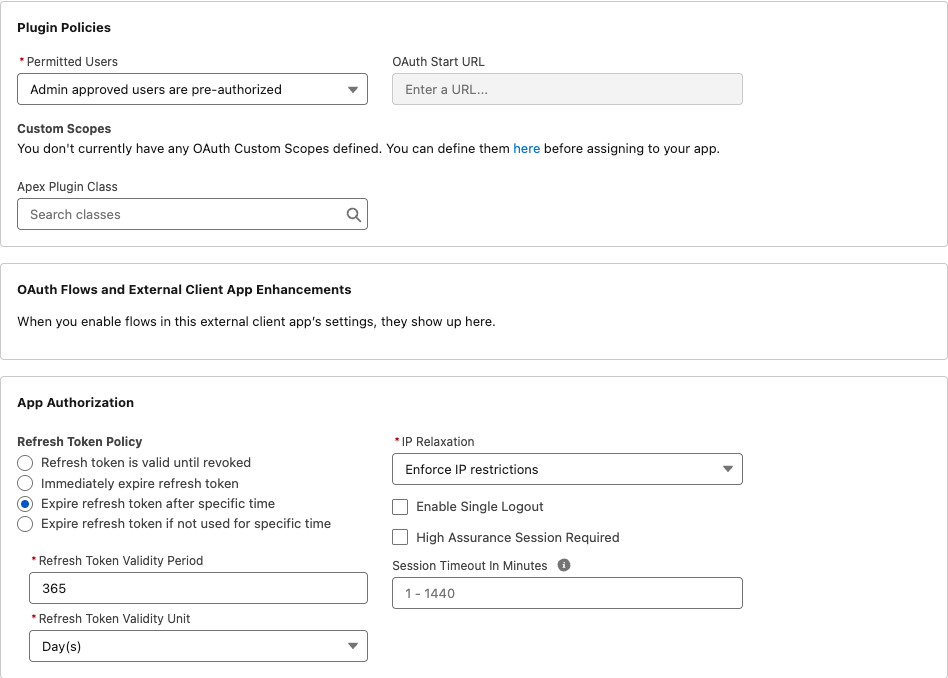
Editand expand theOAuth Policiessection. In some releases, this section is under theOAuth Settingssection from step 2. - Under
App Authorization, setRefresh Token Policyto a value that keeps tokens valid for the lifetime of the AppLink integration.Refresh token is valid until revokedis the most flexible and recommended for long-lived integrations. - Click
Save.
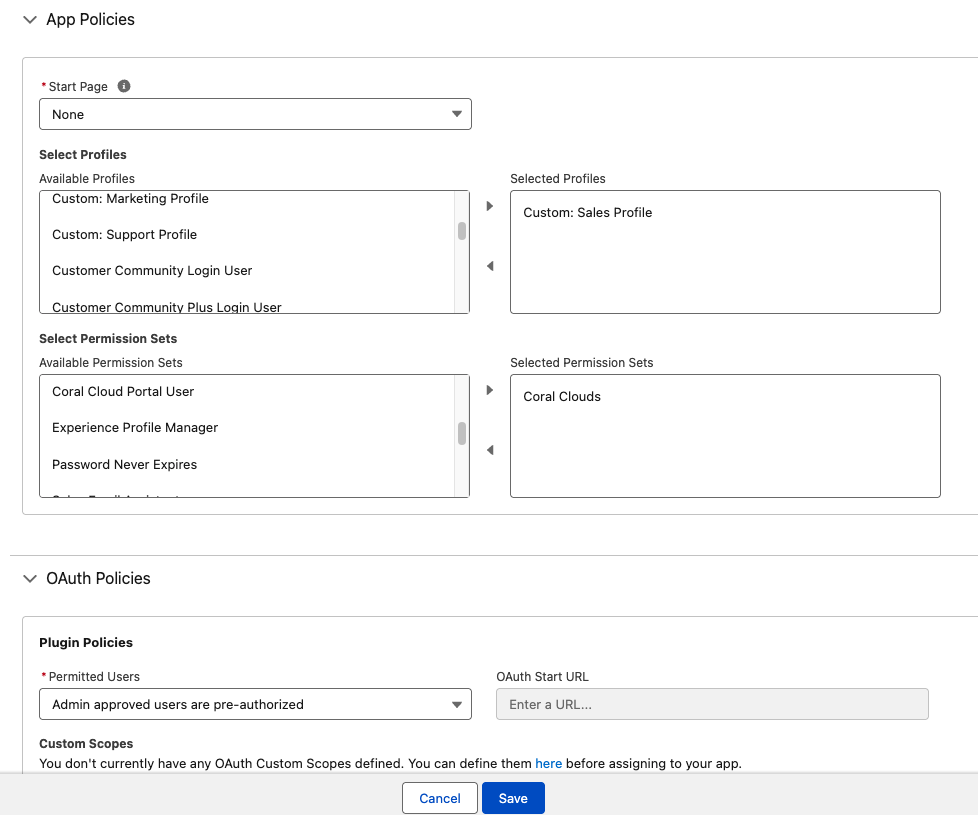
Step 4: Assign the ECA to Users or Profiles
If your org requires explicit grants for an ECA before users can authorize it:
- On the ECA’s detail page, select the
Policiestab. - Click
Editand expand theOAuth Policiessection. - Under
Plugin Policies, set thePermitted Usersdropdown toAdmin approved users are pre-authorized. - Under
App Policies, select the relevant profiles and permission sets to grant access to the ECA. - Click
Save.
Step 5: Verify End-To-End with AppLink
- Create or update an AppLink connection pointing at this org.
- Trigger the OAuth flow and confirm:
- The consent page lists the three scopes from step 2.
- The callback URL resolves and the connection is persisted.
- A subsequent API spec file publish operation that references the ECA’s
API Namesucceeds.
If the publish fails with a name-related error from Salesforce, re-check that the externalClientApp in your API spec file matches the ECA’s API Name exactly. The API Name is case-sensitive.