Table of Contents [expand]
Last updated June 03, 2024
The Access tab of your Enterprise Account lists all of the account’s members and their associated permissions:
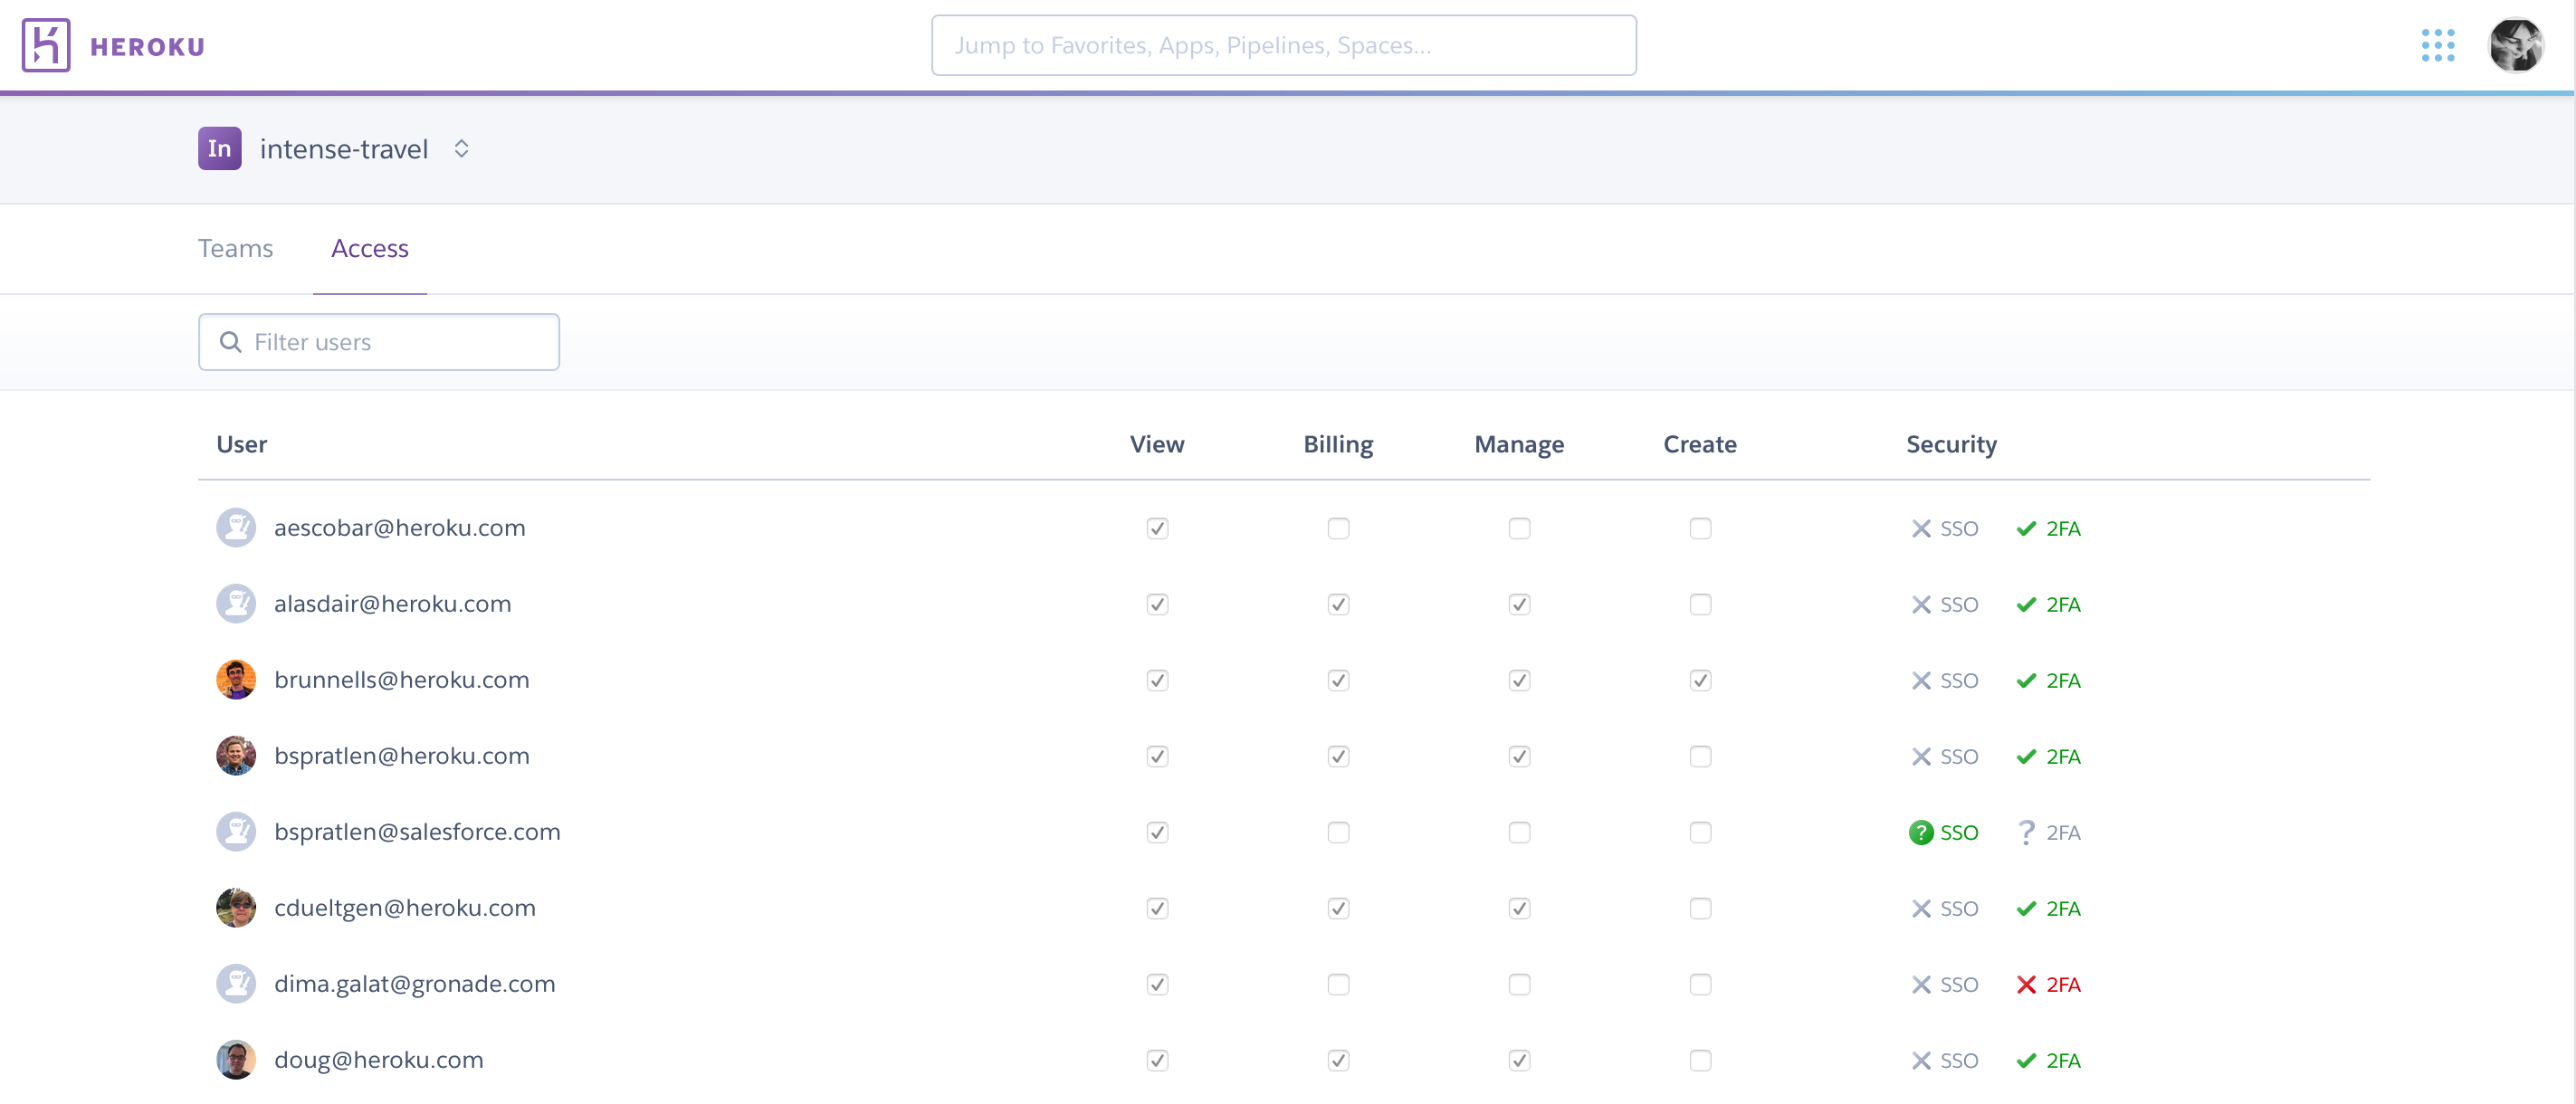
The table also includes a Security column, which indicates whether each member has enabled SSO and/or two-factor authentication. You can filter the table by member permissions and security status.
Permissions summary
Each member of an Enterprise Account has a combination of the following permissions:
ViewBillingManageCreate
Each of these permissions is described below. The following table provides a summary of the actions they allow:
| Action | View | Billing | Manage | Create |
|---|---|---|---|---|
| View the Enterprise Teams that the member has a role in | X | X | X | X |
| View the Access tab | X | X | X | X |
| Manage Enterprise Teams from the Teams tab | X | |||
| Manage account members (add, remove, and edit permissions) | X | |||
| Use the features of the Settings tab (set up and manage SSO, download audit logs) | X | |||
| Use the features of the Usage tab (export usage files) | X | |||
| Create, rename, and delete Enterprise Teams | X |
The View permission
All members of an Enterprise Account have the View permission. It provides read-only access to the account’s Access and Teams tabs. The Teams tab presents a list of the Enterprise Teams that the member belongs to.
The Billing permission
The Billing permission enables you to access the Usage tab of your Enterprise Account and download monthly usage reports:

The Manage permission
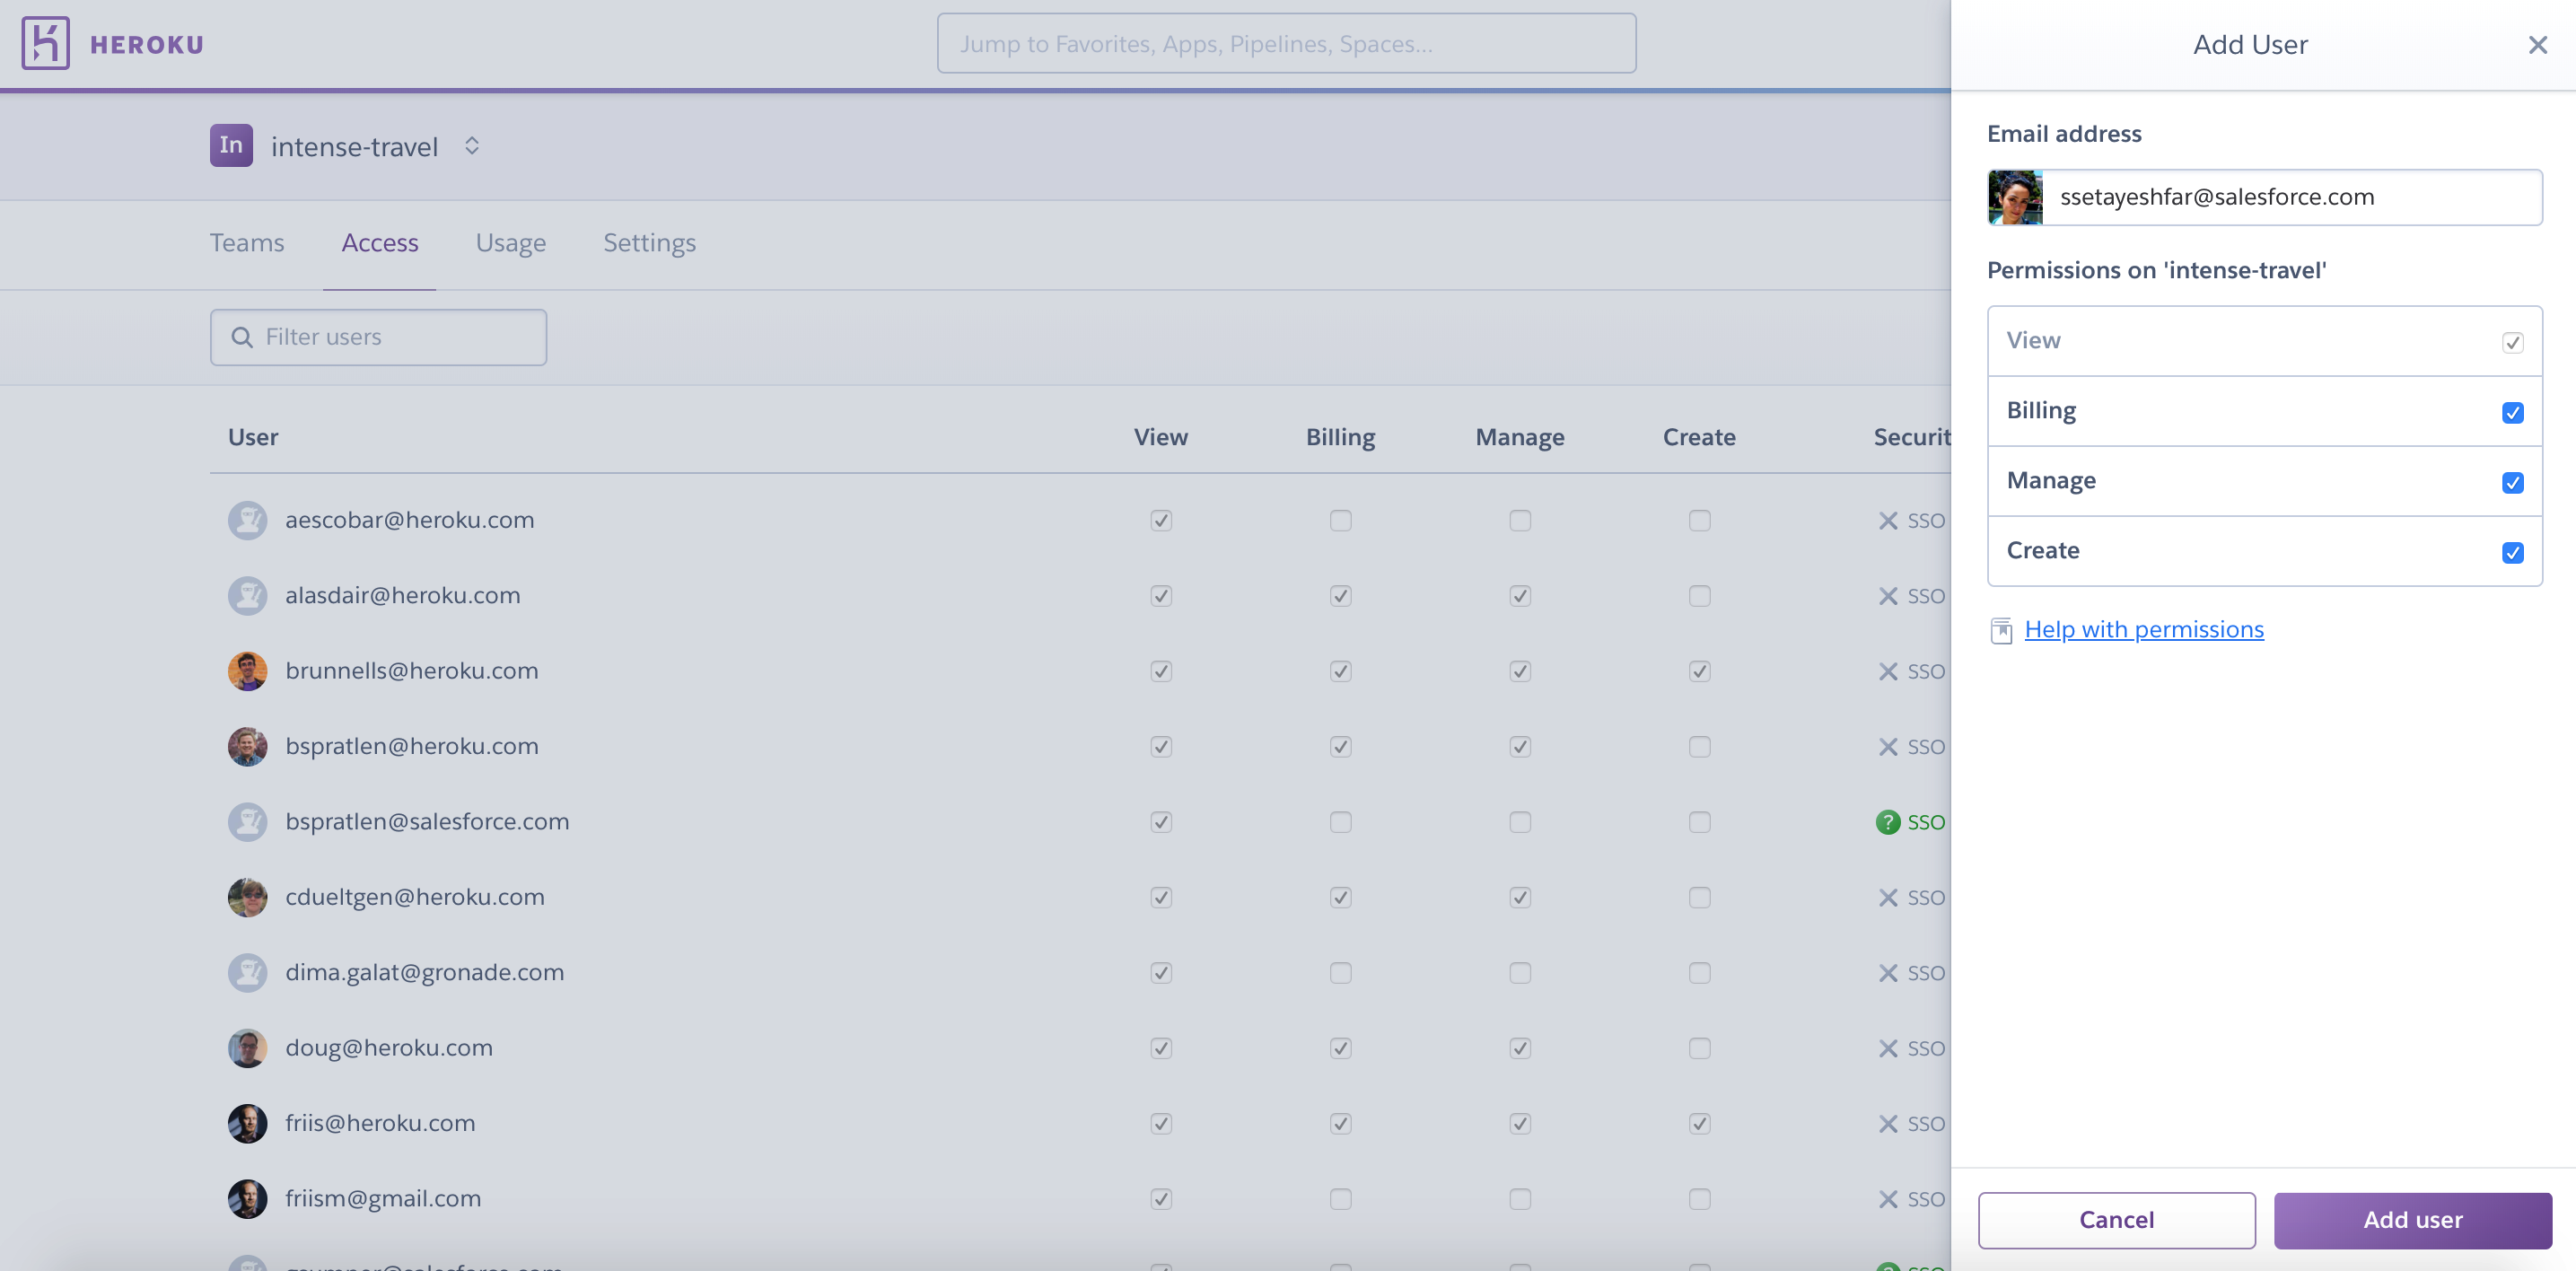
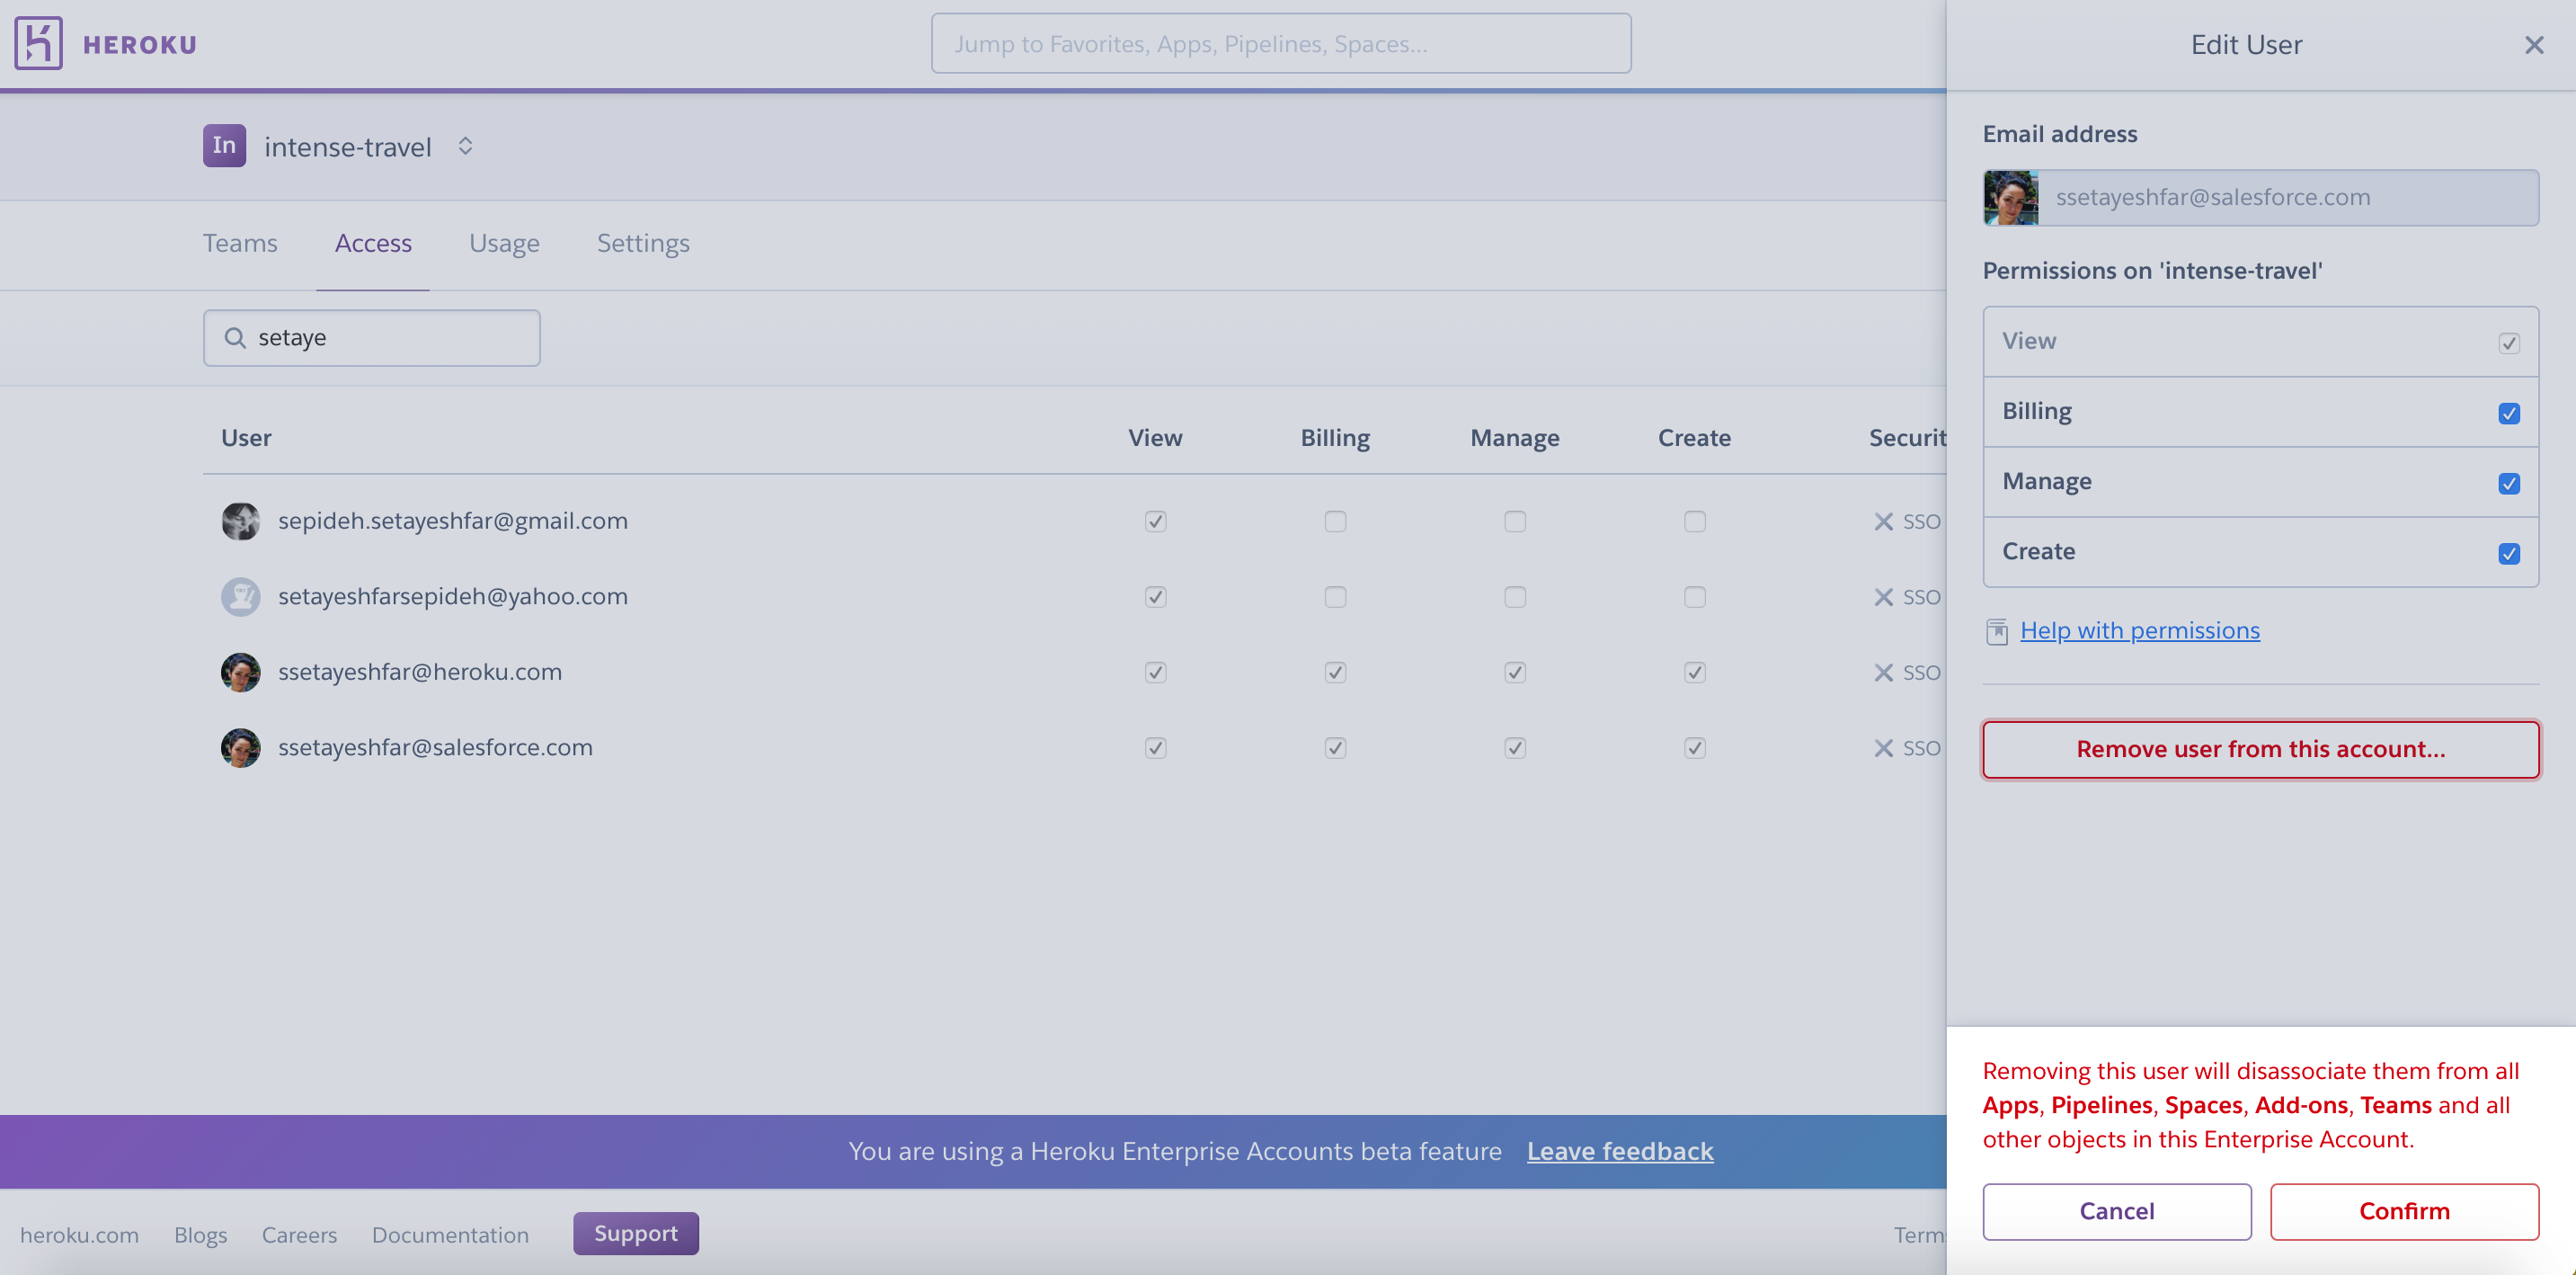
The Manage permission enables you to add users, remove users, and edit user permissions from the Access tab:
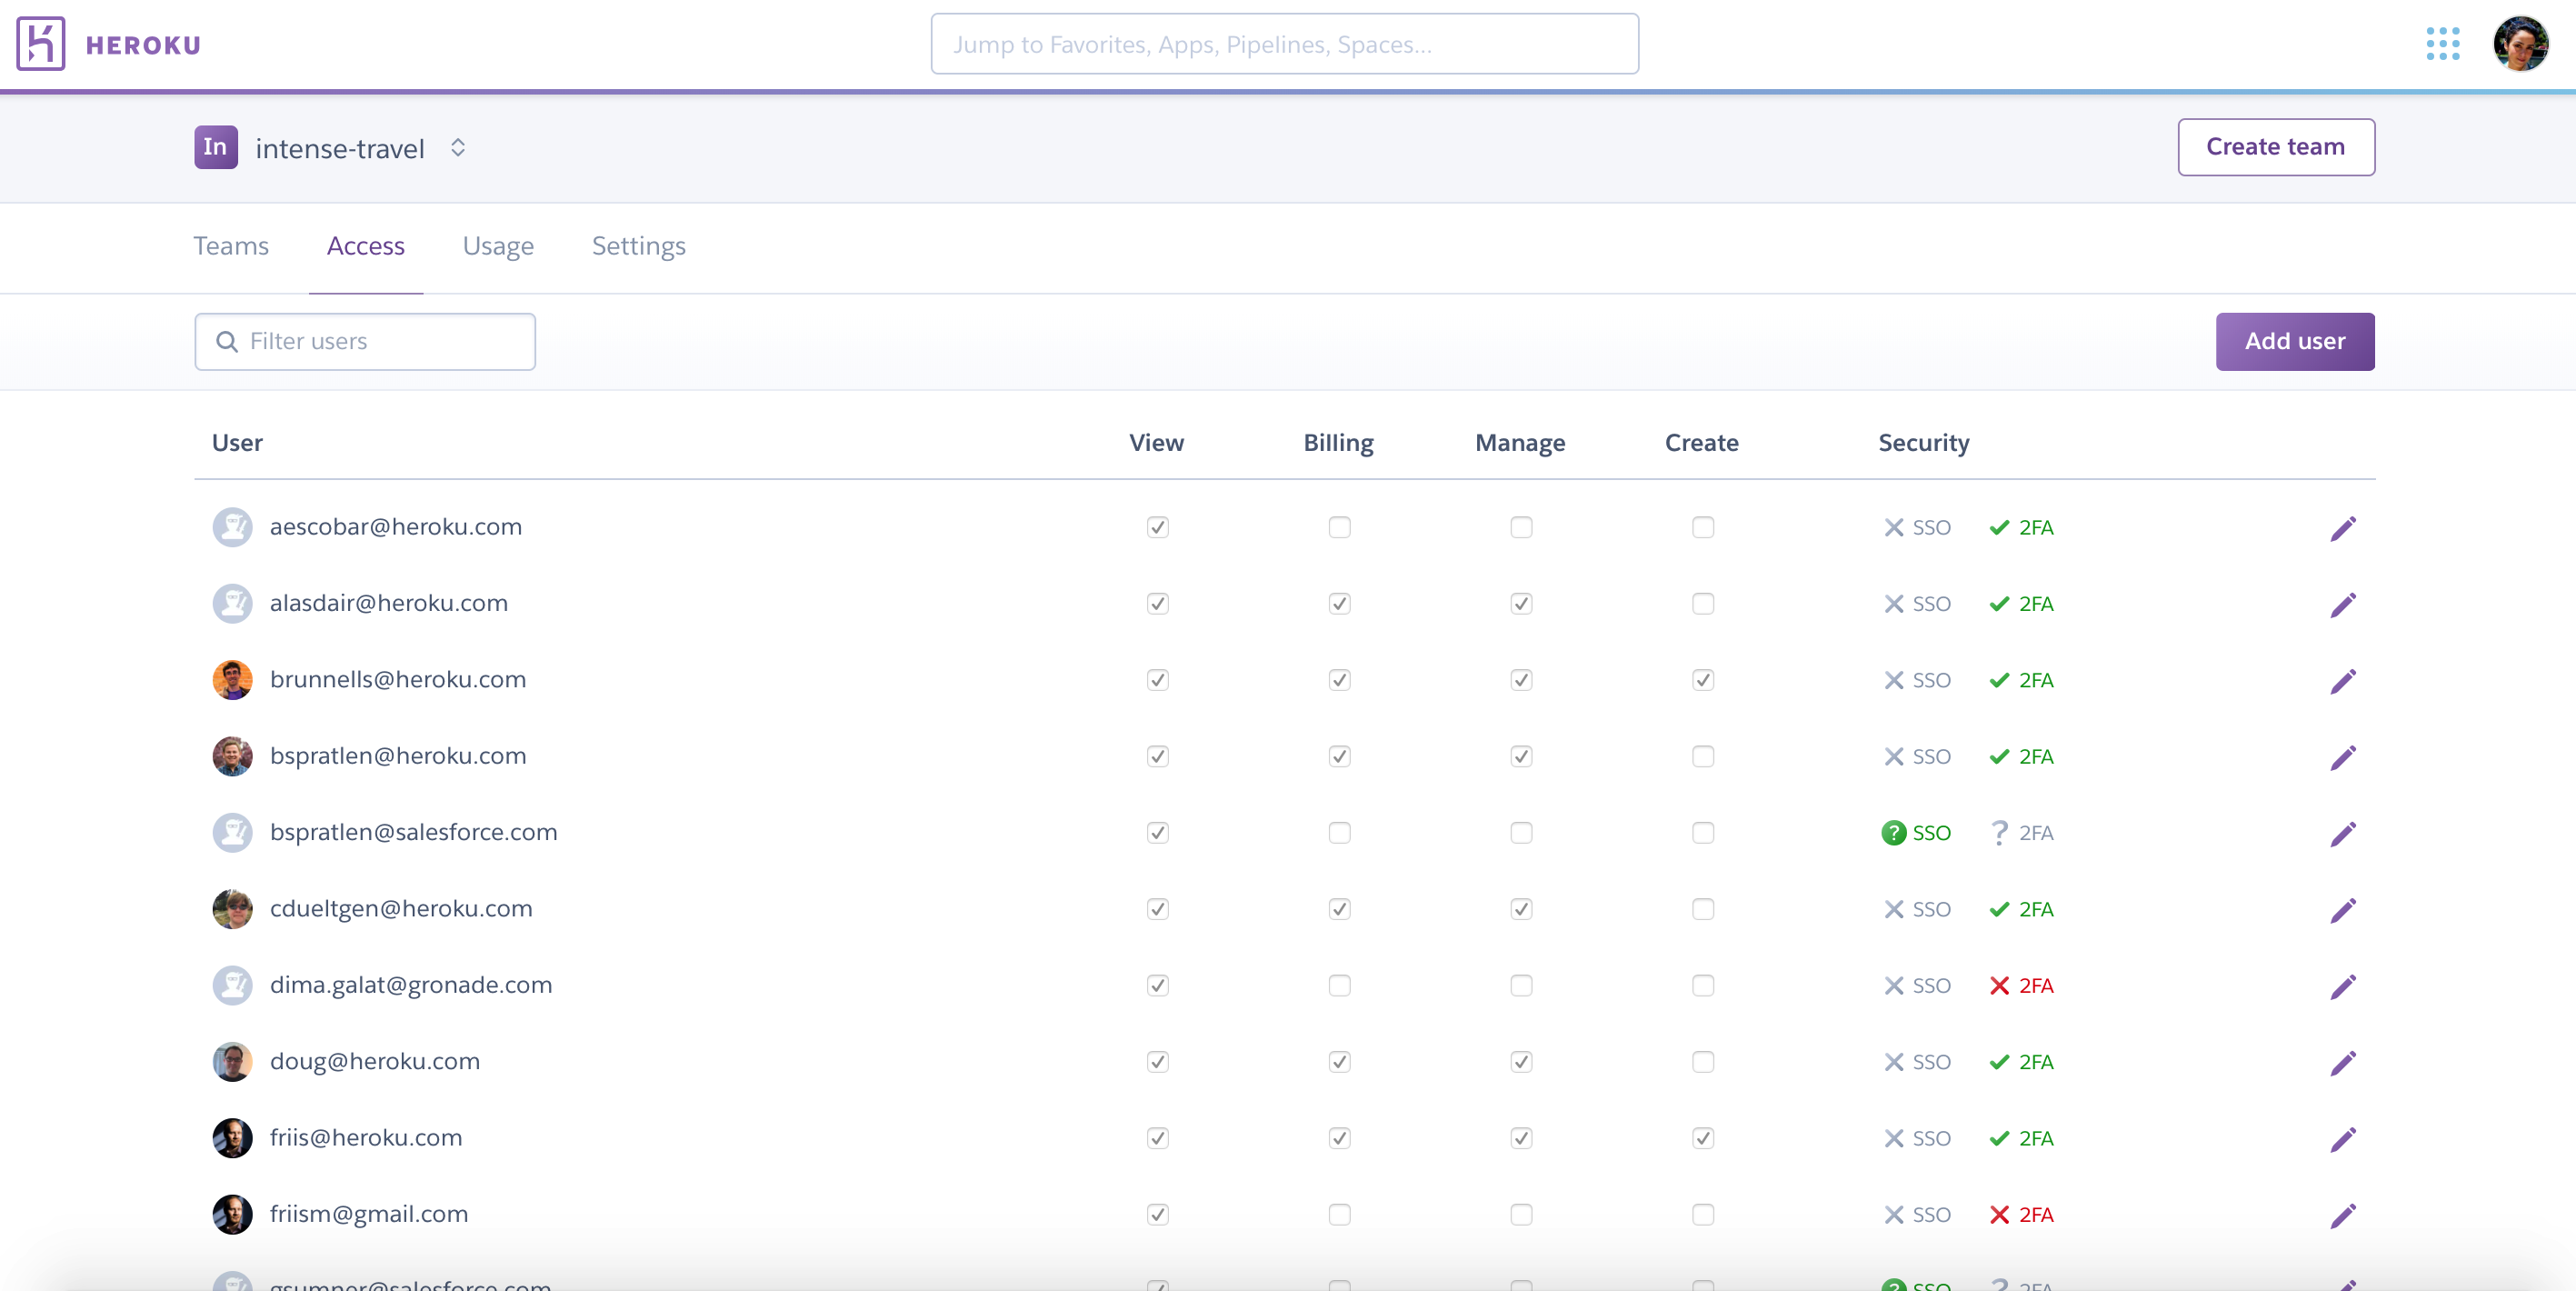
Add a user by clicking the Add user button in the top-right corner of the tab. When the Add User dialog appears, specify the user’s email address and applicable permissions, then click Add user:
Edit a user’s permissions or remove them from the Enterprise Account by clicking the pencil icon to the right of their row in the table. The Edit User dialog appears, which enables you to set new permissions or remove the user entirely:
The Create permission
The Create permission enables you to create, rename, and delete Enterprise Teams that belong to your Enterprise Account.
To rename or delete a team, select it from the Teams tab of the Enterprise Account. Then navigate to the team’s Settings tab to change its name or delete it.
Click the Create team button in the upper-right corner of your account’s Teams tab to create a new team. When the “Create a new team” dialog appears, specify a name for the team and click Create team:
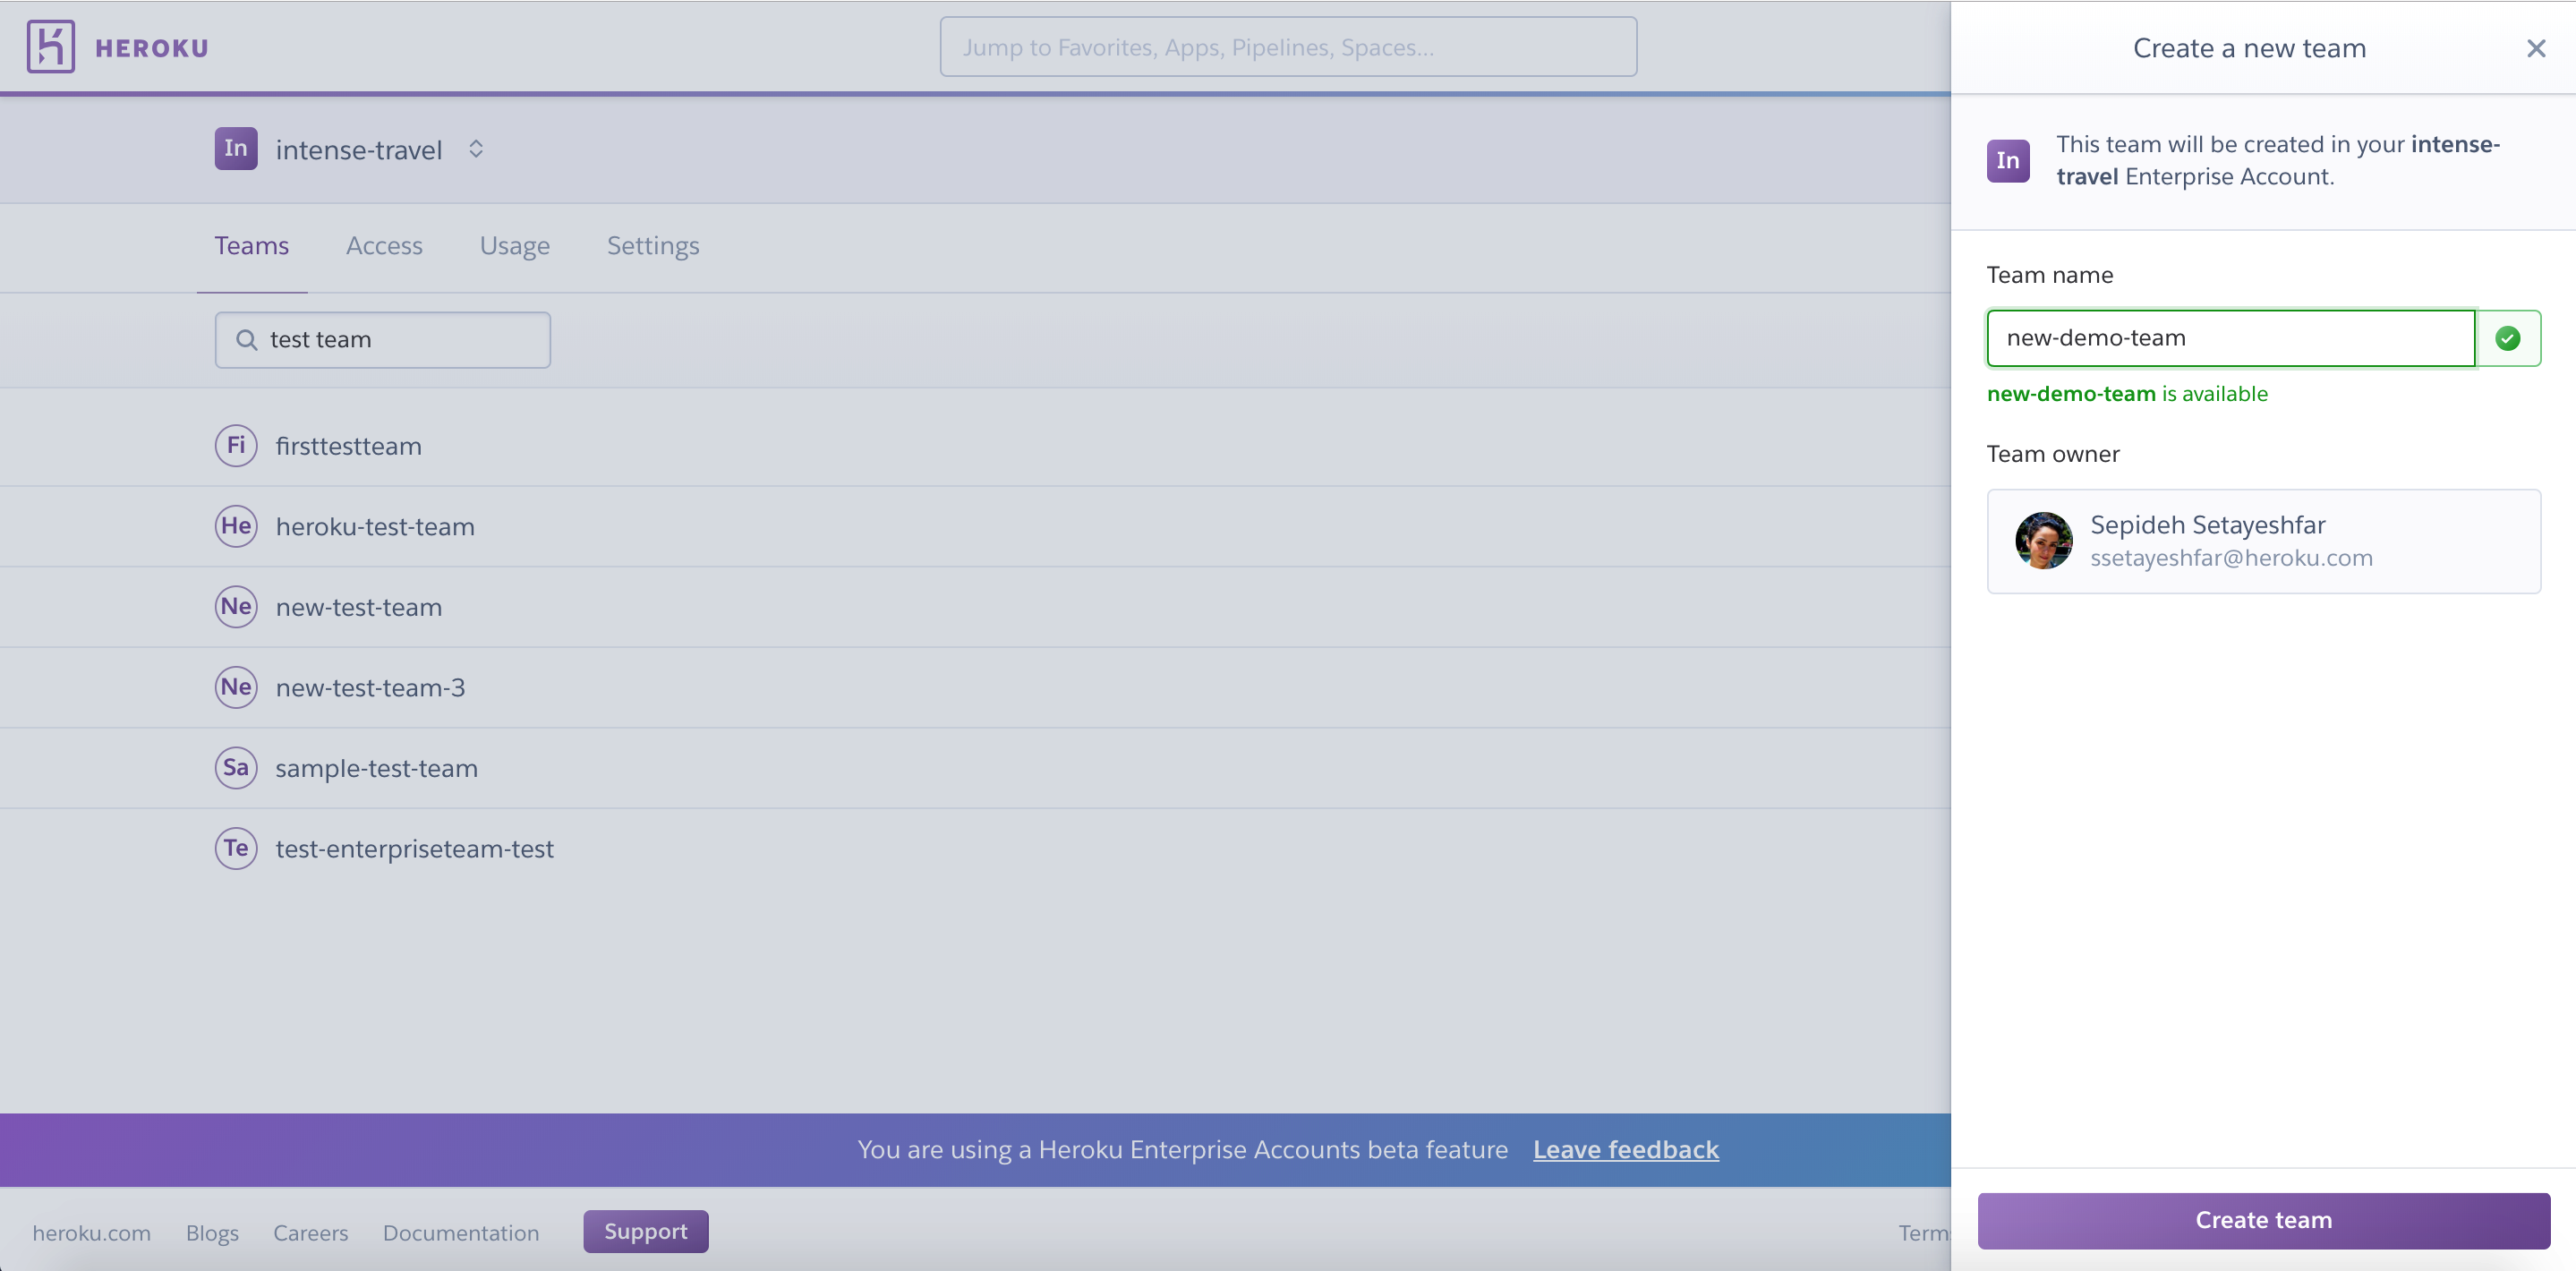
As the creator of an Enterprise Team, you are granted the admin permission for the team, which allows you to manage its users, resources, and other settings.