Last updated June 16, 2023
Built-in authenticators, also called platform authenticators, verify a user’s identity through a biometric reader. A biometric reader can be a fingerprint, iris, or facial recognition scanner, which is built into a user’s computer or mobile device. In some cases, built-in authenticators confirm a user via a PIN or password that the user sets up in their device’s operating system.
This type of verification method streamlines the multi-factor authentication (MFA) requirement because it relies on built-in mechanisms rather than needing a separate authenticator app or physical security key. Depending on the browser and operating system that you use, built-in authenticators include Touch ID, Face ID, and Windows Hello.
Before Using Built-In Authenticators
Before using built-in authenticators, keep these considerations in mind.
- Your device, operating system, and browser all must support the FIDO2 WebAuthn standard.
- You must enable the built-in authenticator service, such as Touch ID, Face ID, or Windows Hello, and set it up to verify your identity via a biometric, PIN, or password.
- To use biometric authentication, a device must include a fingerprint, iris, or facial recognition scanner that’s supported by the built-in authenticator service.
To learn more, see FIDO2 WebAuthn or the documentation for your device.
This type of verification method is bound to a specific device. If you access Heroku from multiple computers, such as a desktop workstation and a laptop, you must register a built-in authenticator on each system.
To ensure that you can log in to Heroku on other devices where a built-in authenticator isn’t present, we recommend that you register another verification method.
Registering a Built-In Authenticator
To register a built-in authenticator as an MFA verification method:
- From
Account Settings, selectSetup Multi-Factor Authentication. Or if you already enabled other verification methods, selectManage Multi-Factor Authentication. - On the next page, choose
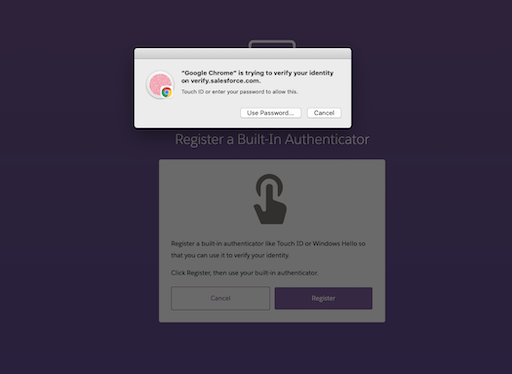
Add Built-in Authenticatorand follow the prompts to complete registration. Your registration experience can vary based on the specific device, OS version, and browser in use. In general, registration involves these steps. - To add a built-in authenticator, click
Register. - When prompted, activate your built-in authenticator. For example, use Touch ID for fingerprint verification.
- Name your authenticator, and complete registration.

MFA Verification with a Built-In Authenticator
To log in with a built-in authenticator:
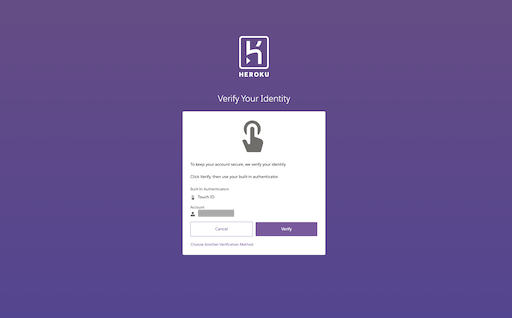
- After entering your email and password, you’re prompted to verify your login request with your authenticator.
- When prompted, activate your built-on authenticator. For example, use Touch ID for fingerprint verification.
