Table of Contents [expand]
- Provisioning the add-on
- Local setup
- Configure Redis on Java
- Configure Redis on Ruby
- Configure Redis on Python
- Configure Redis on PHP
- Configure Redis on Go
- Configure Redis on Node.js
- Dashboard and web UI (Redis Commander)
- Set eviction policy
- Full-text search, JSON documents, vector search and time series
- Upgrading your plan
- Removing the add-on
- Support
- Additional resources
Last updated August 04, 2026

This add-on is operated by Stackhero
Redis® on dedicated instances, up-to-date versions and super attractive prices.
Stackhero for Redis provides a managed Redis instance running on a fully dedicated instance.
With your Stackhero for Redis add-on you will get:
- A private instance (dedicated VM) for high performances and security
- TLS encryption (aka SSL)
- An automatic backup every 24 hours
- A graphical web UI (Redis Commander)
- One click to update to new Redis versions
- Full-text search, JSON documents, vector search, Bloom filters and time series included
All Redis clients can connect to Stackhero for Redis and there is a Redis client library for almost every language out there, including Ruby, Node.js, Java, Python, Clojure and Erlang.
When you will choose a Redis client library, prefer one that supports TLS encryption (aka SSL) for best security. We strongly discourage you to use Redis without TLS support unless you know exactly what you are doing.
Provisioning the add-on
Stackhero for Redis can be attached to a Heroku application via the CLI:
A list of all plans available can be found here.
$ heroku addons:create --wait ah-redis-stackhero --app <your app name>
Creating ah-redis-stackhero...
Your add-on is being provisioned on Stackhero. It will be available in around 2 minutes.
After you provision Stackhero for Redis, the STACKHERO_REDIS_URL_TLS and STACKHERO_REDIS_URL_CLEAR config variables are available in your app’s configuration. They contain the URLs to your Redis instance as its credentials.
STACKHERO_REDIS_URL_TLSis the URL to your Redis instance with TLS encryption. This is the recommended way to connect to your Redis instance.STACKHERO_REDIS_URL_CLEARis the URL to your Redis instance with no encryption (clear).
You can see the content of those variables via the heroku config:get command:
$ heroku config:get STACKHERO_REDIS_URL_TLS
rediss://user:password@domain:port
After you install Stackhero for Redis, your application should be configured to fully integrate with the add-on.
Local setup
After you provision the add-on, it’s necessary to locally replicate its config variables so your development environment can operate against the service.
Use the Heroku Local command-line tool to configure, run and manage process types specified in your app’s Procfile. Heroku Local reads configuration variables from a .env file. To view all of your app’s config variables, type heroku config. Use the following command for each value that you want to add to your .env file:
$ heroku config:get STACKHERO_REDIS_URL_TLS -s  >> .env
$ heroku config:get STACKHERO_REDIS_URL_CLEAR -s  >> .env
Credentials and other sensitive configuration values should not be committed to source-control. In Git, exclude the .env file with: echo .env >> .gitignore.
For more information, see the Heroku Local article.
Configure Redis on Java
You can use the environment variable STACKHERO_REDIS_URL_TLS to connect to Redis.
Here is an example of a connection using Jedis:
private static Jedis getConnection() throws URISyntaxException {
  URI redisURI = new URI(System.getenv("STACKHERO_REDIS_URL_TLS"));
  Jedis jedis = new Jedis(redisURI);
  return jedis;
}
You will find more information on the official Jedis repository and the official wiki.
In a multithreaded environment, like a webserver, you should use Jedis Pool:
public static JedisPool getPool() {
  URI redisURI = new URI(System.getenv("STACKHERO_REDIS_URL_TLS"));
  JedisPoolConfig poolConfig = new JedisPoolConfig();
  poolConfig.setMaxTotal(10);
  poolConfig.setMaxIdle(5);
  poolConfig.setMinIdle(1);
  poolConfig.setTestOnBorrow(true);
  poolConfig.setTestOnReturn(true);
  poolConfig.setTestWhileIdle(true);
  JedisPool pool = new JedisPool(poolConfig, redisURI);
  return pool;
}
See the official wiki for more information.
Configure Redis on Ruby
Install the Redis gem:
$ bundle add redis
With Rails, you have to create the initializer file config/initializers/redis.rb like this:
$redis = Redis.new(url: ENV["STACKHERO_REDIS_URL_TLS"])
To use Redis as a cache system, edit the config/environments/production.rb file and add this line:
config.cache_store = :redis_cache_store, { url: ENV['STACKHERO_REDIS_URL_TLS'] }
By default caching is only enabled on production environment.
If you need to test caching on development, edit the file config/environments/development.rb, add the configuration from above and add config.action_controller.perform_caching = true to enable caching.
A good way to test that caching works is to start a Rails console (with bin/rails console) and test writing with Rails.cache.write("foo", "bar").
Configure Redis on Sidekiq
To use Stackhero for Redis as your Sidekiq Redis server, set the environment variable REDIS_PROVIDER to STACKHERO_REDIS_URL_TLS:
$ heroku config:set REDIS_PROVIDER=STACKHERO_REDIS_URL_TLS
Sidekiq will automatically use Stackero for Redis then.
Configure Redis on Resque
Edit the file config/resque.yml and replace production: <%= ENV['REDIS_URL'] %> with this value:
production: <%= ENV['STACKHERO_REDIS_URL_TLS'] %>
Resque will then use Stackero for Redis.
Configure Redis on Python
Install the Redis package:
$ pip install redis
$ pip freeze > requirements.txt
import os
import redis

r = redis.from_url(os.environ.get("STACKHERO_REDIS_URL_TLS"))
You will get more information from the official Python redis package documentation.
How to avoid error “Connection closed by server” with Redis and Python
The error “redis.exceptions.ConnectionError: Connection closed by server” is potentially related to the fact that your Python app doesn’t exchange data with Redis for a certain time and the connection closes automatically. When your app tries to exchange again with Redis, the connection doesn’t work anymore and you get the error “Connection closed by server”.
To resolve this, you can pass the health_check_interval setting to your Redis connection like this:
r = redis.from_url(
  'rediss://default:<password>@XXXXXX.stackhero-network.com:<port>',
  health_check_interval=10,
  socket_connect_timeout=5,
  retry_on_timeout=True,
  socket_keepalive=True
)
If you use the Redis PubSub feature, the redis-py library assumes that you call functions get_message() or listen() more frequently than health_check_interval seconds.
In our example above, we have set health_check_interval to 10 seconds so your app has to call get_message() or listen() at least one time each 10 seconds (see the redis-py official documentation).
If it is not the case, you will get the error “Connection closed by server” too.
To avoid that, a trick is to call check_health() regularly.
Here is an example:
import redis
import threading

# Connection to Redis
r = redis.from_url(
  'rediss://default:<password>@XXXXXX.stackhero-network.com:<port>',
  health_check_interval=10,
  socket_connect_timeout=5,
  retry_on_timeout=True,
  socket_keepalive=True
)

# Create a PubSub instance
p = r.pubsub()

# Subscribe to the channel "test"
p.subscribe('test')

# Create a function that will call `check_health` every 5 seconds
def redis_auto_check(p):
  t = threading.Timer(5, redis_auto_check, [ p ])
  t.start()
  p.check_health()

# Call the redis_auto_check function
redis_auto_check(p)
Configure Redis on PHP
Retrieve the URL with getenv('STACKHERO_REDIS_URL_TLS') and pass it to your preferred Redis client library.
Handle PHP sessions with Redis
You can use the following code to store PHP sessions on Stackhero for Redis:
<?php

// Parse Heroku Redis URL from environment
$redis_url = parse_url(getenv('STACKHERO_REDIS_URL_TLS'));

// Configure session handler
ini_set('session.save_handler', 'redis');
ini_set('session.save_path', "tls://{$redis_url['host']}:{$redis_url['port']}?auth={$redis_url['pass']}&timeout=5");

// Start the session
session_start();

?>
Configure Redis on Go
First install the go-redis package:
$ go get github.com/redis/go-redis/v9
Then, import it in your code:
import "github.com/redis/go-redis/v9"
Finally, connect to the Redis server using the STACKHERO_REDIS_URL_TLS variable:
opt, err := redis.ParseURL(os.Getenv("STACKHERO_REDIS_URL_TLS"))
if err != nil {
    panic(err)
}

rdb := redis.NewClient(opt)
You will find more information on the official go-redis repository
Configure Redis on Node.js
We recommend using ioredis.
Install the ioredis package:
$ npm install ioredis
const Ioredis = require('ioredis');

(async () => {

  const redis = new Ioredis(process.env.STACKHERO_REDIS_URL_TLS);

  // Set key "stackhero-example-key" to "abcd"
  await redis.set('stackhero-example-key', 'abcd');

  // Get key "stackhero-example-key"
  const value = await redis.get('stackhero-example-key');
  console.log(`Key "stackhero-example-key" has value "${value}"`);

  // Finally delete key "stackhero-example-key"
  await redis.del('stackhero-example-key');

})().catch(error => {
  console.error('An error occurred!', error);
});
You will find a lot of other examples on the official ioredis repository.
Dashboard and web UI (Redis Commander)
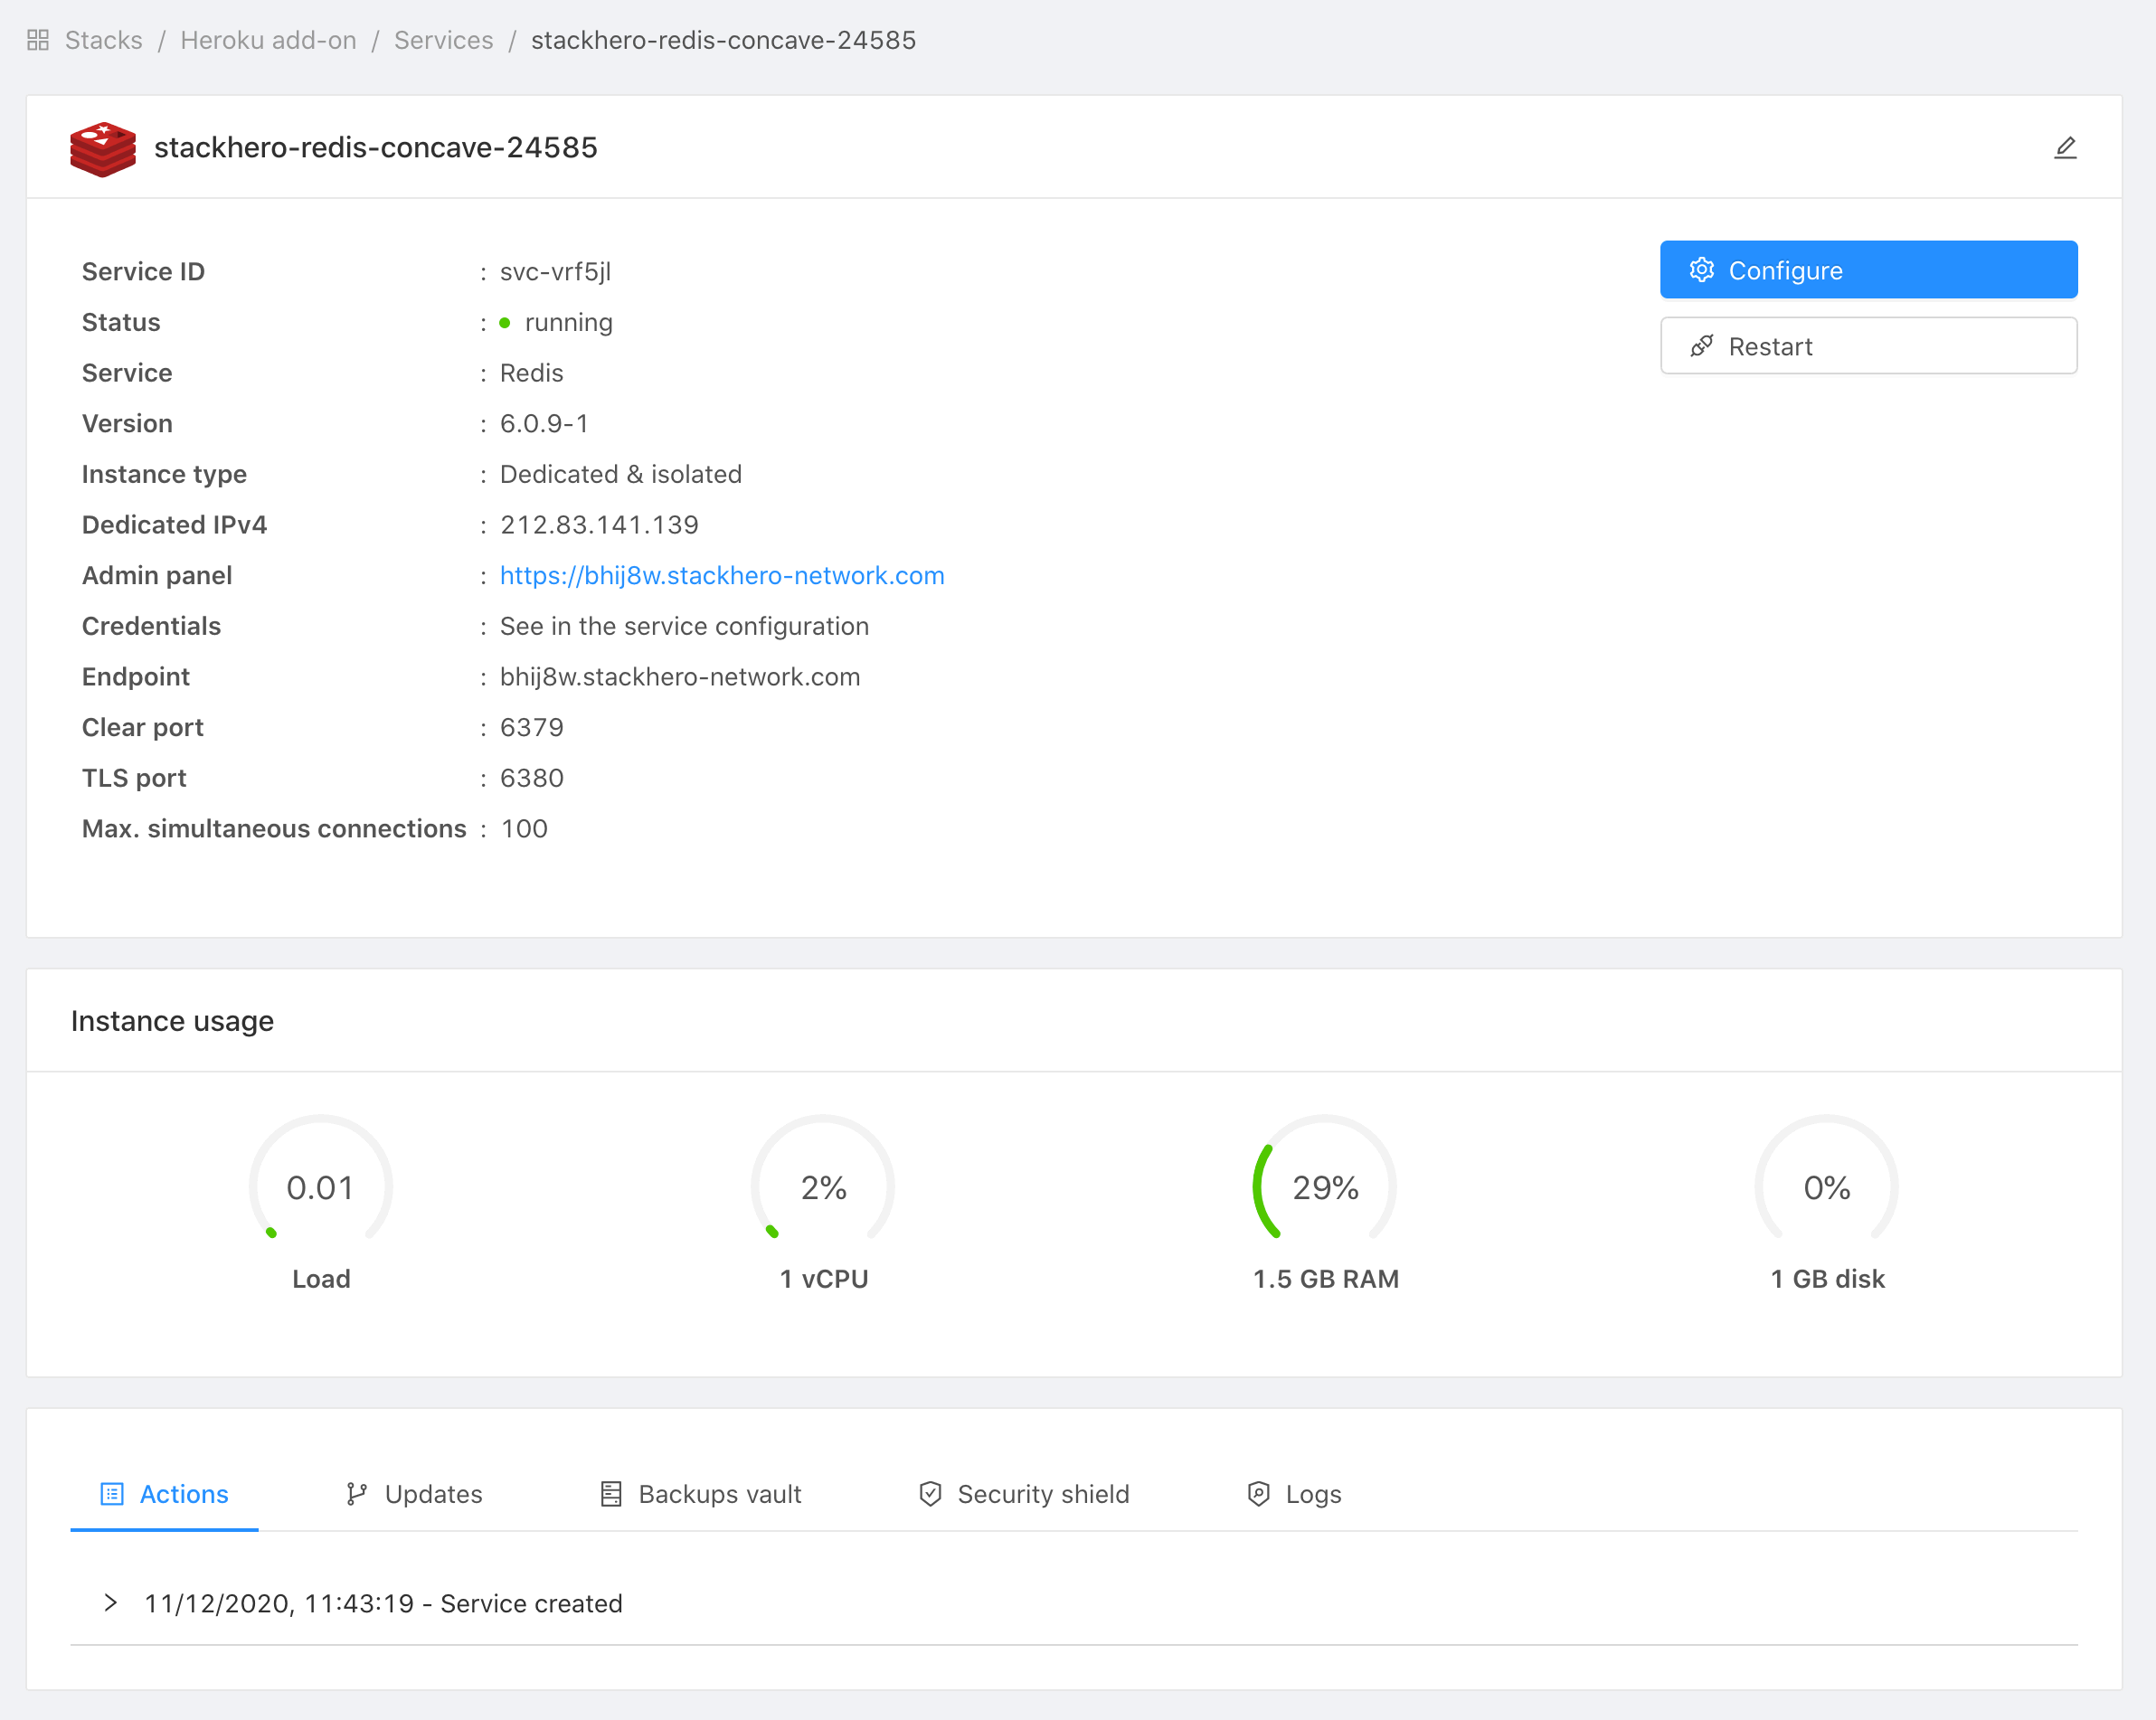
Stackhero dashboard allows you to see your instance usage, restart it, and apply updates. It also gives you the ability to access the web UI to consult your Redis data directly in a graphical way.
You can access the dashboard via the CLI:
$ heroku addons:open ah-redis-stackhero
Opening ah-redis-stackhero for sharp-mountain-4005
or by visiting the Heroku Dashboard and selecting the application in question. Select Stackhero for Redis from the Add-ons menu.
Set eviction policy
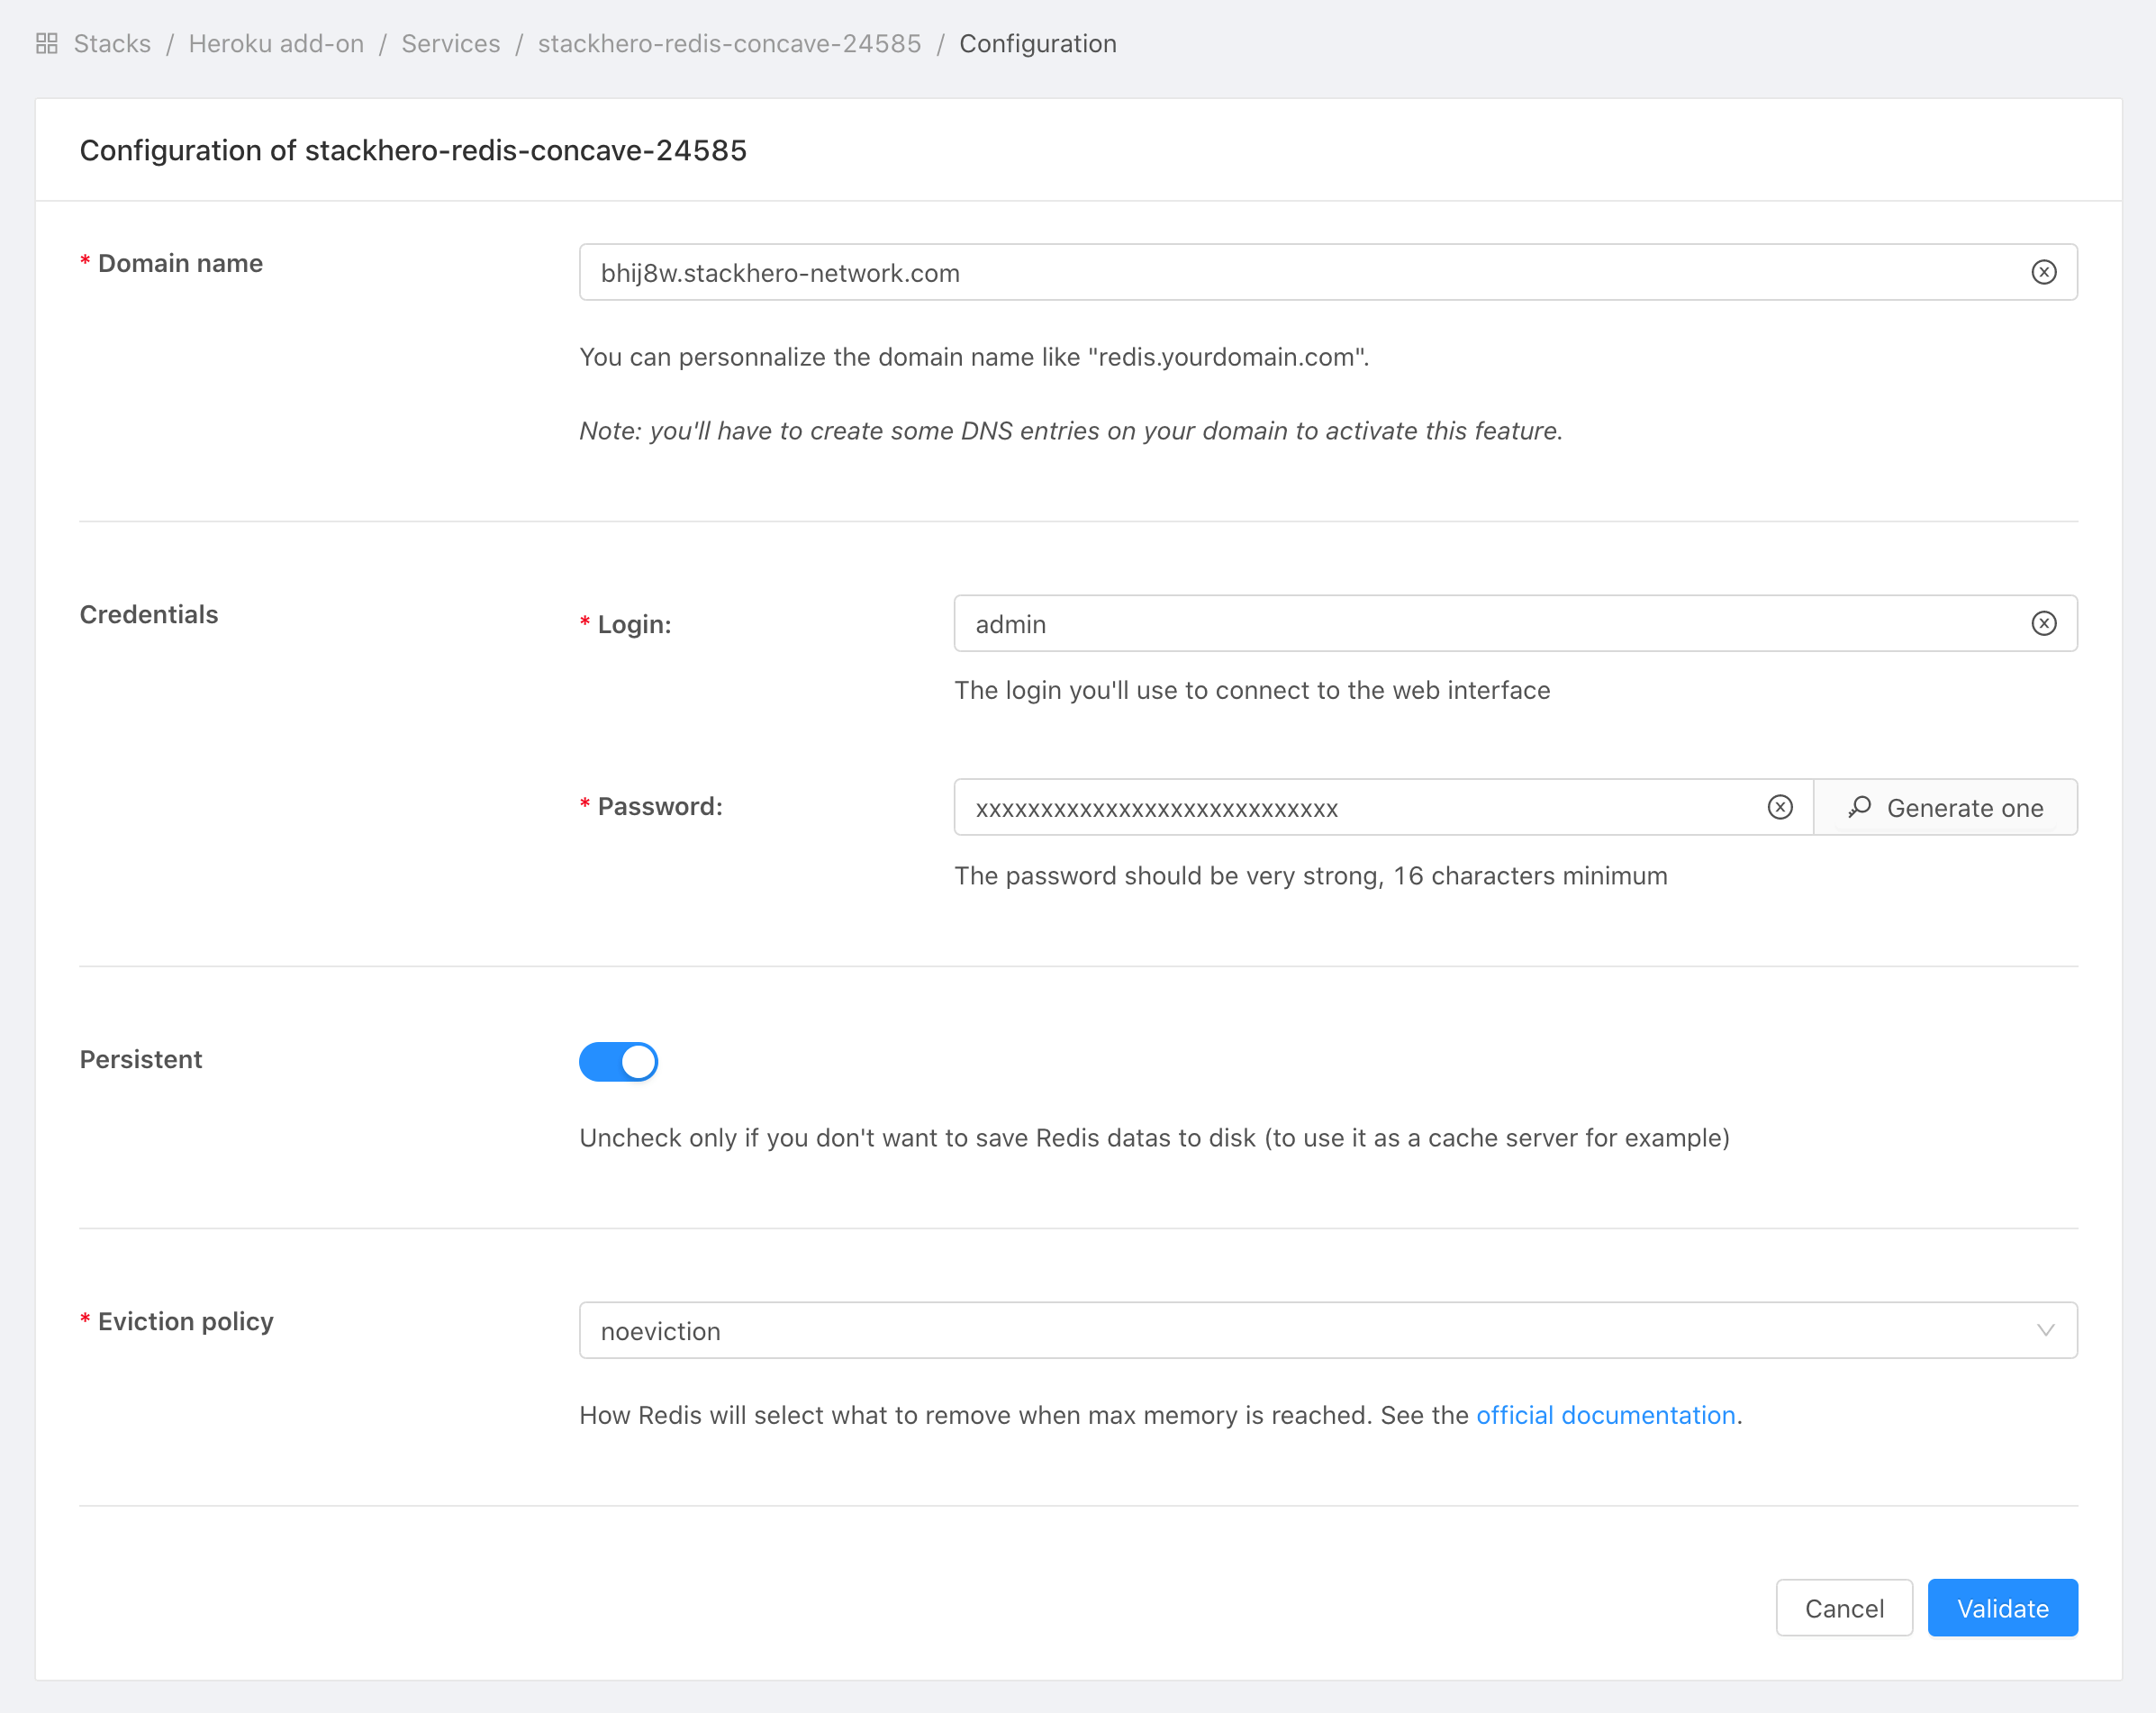
Yon can define how Redis will react when you consume more memory than available on your plan.
To do this, connect to your Stackhero dashboard (see above), select your Redis service, then click on Configure and set the Eviction policy setting.
Full-text search, JSON documents, vector search and time series
Your Stackhero for Redis includes the modules bundled with Redis Open Source, at no extra cost. They turn Redis into much more than a cache: you can index and query your data without adding a search engine or a vector database next to it.
- JSON (
JSON.*commands): store real JSON documents and read or update a single field with JSONPath, instead of serializing a whole object into a string. - Search (
FT.*commands), also known as the Redis Query Engine: secondary indexes, full-text search, numeric and tag filters, aggregations and vector search. - Bloom (
BF.*,CF.*,CMS.*,TOPK.*andTDIGEST.*commands): probabilistic structures that answer “have I already seen this?” over huge sets, in a few kilobytes. - Time series (
TS.*commands): a time series type with retention, downsampling and aggregation.
Vector sets (VADD and VSIM commands) are compiled into Redis itself, so they are always available with nothing to enable.
Enabling the modules
Modules are disabled by default, so an existing instance keeps exactly the behaviour it had.
To enable them, connect to your Stackhero dashboard (see above), select your Redis service, click on Configure, then tick the modules you need in the Modules section and save. Your Redis restarts with them loaded, which takes a few seconds.
Once you have stored data of a module type (a JSON document, a Bloom filter, a time series), keep that module enabled. Redis cannot load that data back without the module that created it, so disabling it would prevent your instance from restarting. Vector sets are not concerned, being a part of Redis itself.
Storing and querying JSON documents
const Ioredis = require('ioredis');

(async () => {

  const redis = new Ioredis(process.env.STACKHERO_REDIS_URL_TLS);

  // Store a product as a real JSON document
  await redis.call(
    'JSON.SET', 'product:1', '$',
    JSON.stringify({ name: 'Red running shoes', brand: 'Acme', price: 89.9, stock: 12 })
  );

  // Read a single field, without transferring the whole document
  const price = await redis.call('JSON.GET', 'product:1', '$.price');
  console.log(`Price: ${price}`); // Price: [89.9]

  // Update a single field atomically
  await redis.call('JSON.NUMINCRBY', 'product:1', '$.stock', -1);

  await redis.quit();

})().catch(error => {
  console.error('An error occurred!', error);
});
Full-text search
An index is created once and then stays up to date on its own: every document matching its prefix is indexed as you write it.
// Create the index once
await redis.call(
  'FT.CREATE', 'productsIndex',
  'ON', 'JSON',
  'PREFIX', '1', 'product:',
  'SCHEMA',
    '$.name', 'AS', 'name', 'TEXT',
    '$.brand', 'AS', 'brand', 'TAG',
    '$.price', 'AS', 'price', 'NUMERIC'
);

// Full-text search
console.log(
  await redis.call('FT.SEARCH', 'productsIndex', 'running', 'RETURN', '1', 'name')
);

// Full-text, tag and numeric filters combined in a single query
console.log(
  await redis.call(
    'FT.SEARCH', 'productsIndex', '@brand:{Acme} @price:[0 100]',
    'RETURN', '2', 'name', 'price'
  )
);
Search indexes only work on the database 0, which is the default one.
Vector search, for semantic search and RAG
If you are building semantic search, a recommendation engine or a retrieval-augmented generation (RAG) pipeline, you need to store embeddings and find the closest ones to a query. The search module does that natively, and it can combine a vector similarity search with regular filters in a single query: “the 5 chunks closest to this question, but only from the documents this user may read” is one request, not three.
// A vector field is declared with its dimension and its distance metric.
// The dimension must match your embeddings model: 1536 for OpenAI
// text-embedding-3-small, 768 for many open source models, and so on.
await redis.call(
  'FT.CREATE', 'chunksIndex',
  'ON', 'HASH',
  'PREFIX', '1', 'chunk:',
  'SCHEMA',
    'content', 'TEXT',
    'documentId', 'TAG',
    'embedding', 'VECTOR', 'HNSW', '6',
      'TYPE', 'FLOAT32',
      'DIM', '1536',
      'DISTANCE_METRIC', 'COSINE'
);

// Embeddings are stored as raw little-endian float32 bytes
const toBytes = embedding => Buffer.from(Float32Array.from(embedding).buffer);

await redis.call(
  'HSET', 'chunk:1',
  'content', 'Refunds are issued within 14 days',
  'documentId', 'faq',
  'embedding', toBytes(chunkEmbedding)
);

// The 5 chunks closest to the question, restricted to one document
const results = await redis.call(
  'FT.SEARCH', 'chunksIndex',
  '@documentId:{faq}=>[KNN 5 @embedding $queryVector AS score]',
  'SORTBY', 'score',
  'RETURN', '2', 'content', 'score',
  'DIALECT', '2',
  'PARAMS', '2', 'queryVector', toBytes(questionEmbedding)
);
The same thing in Python, with the redis package:
import os
import numpy as np
import redis

r = redis.from_url(os.environ['STACKHERO_REDIS_URL_TLS'])

def to_bytes(embedding):
    return np.array(embedding, dtype=np.float32).tobytes()

r.hset('chunk:1', mapping={
    'content': 'Refunds are issued within 14 days',
    'documentId': 'faq',
    'embedding': to_bytes(chunk_embedding)
})

results = r.execute_command(
    'FT.SEARCH', 'chunksIndex',
    '@documentId:{faq}=>[KNN 5 @embedding $queryVector AS score]',
    'SORTBY', 'score',
    'RETURN', '2', 'content', 'score',
    'DIALECT', '2',
    'PARAMS', '2', 'queryVector', to_bytes(question_embedding)
)
Vector queries need DIALECT 2. Without it the query is parsed with the older syntax and returns an error.
Indexes consume the memory of your plan, exactly like your data does. A large text or vector index can be significant, so watch your memory usage on your Stackhero dashboard after building one, and move to a larger plan if you need to.
You will find complete guides on search and JSON and on vector search and RAG in the Redis documentation by Stackhero.
Upgrading your plan
You cannot downgrade an existing add-on.
Application owners should carefully manage the migration timing to ensure proper application function during the migration process.
Use the heroku addons:upgrade command to migrate to a new plan.
$ heroku addons:upgrade ah-redis-stackhero:newplan
-----> Upgrading ah-redis-stackhero:newplan to sharp-mountain-4005... done
       Your plan has been updated to: ah-redis-stackhero:newplan
Removing the add-on
You can remove Stackhero for Redis via the CLI:
This will destroy all associated data and cannot be undone!
$ heroku addons:destroy ah-redis-stackhero
-----> Removing ah-redis-stackhero from sharp-mountain-4005... done
Support
Stackhero for Redis support and runtime issues should be submitted via one of the Heroku Support channels. We recommend adding support@stackhero.io in copy for urgent issues.
Additional resources
- Redis documentation by Stackhero
- Redis managed cloud